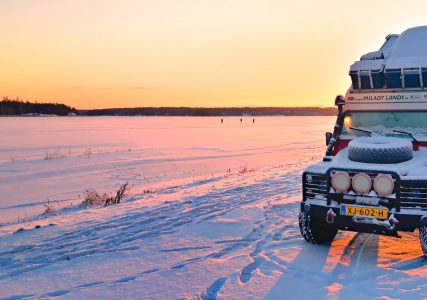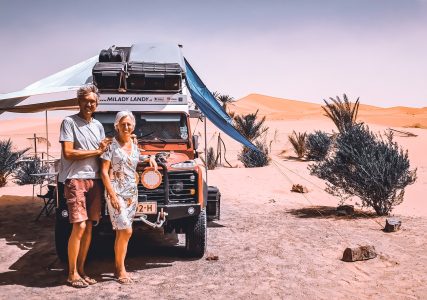
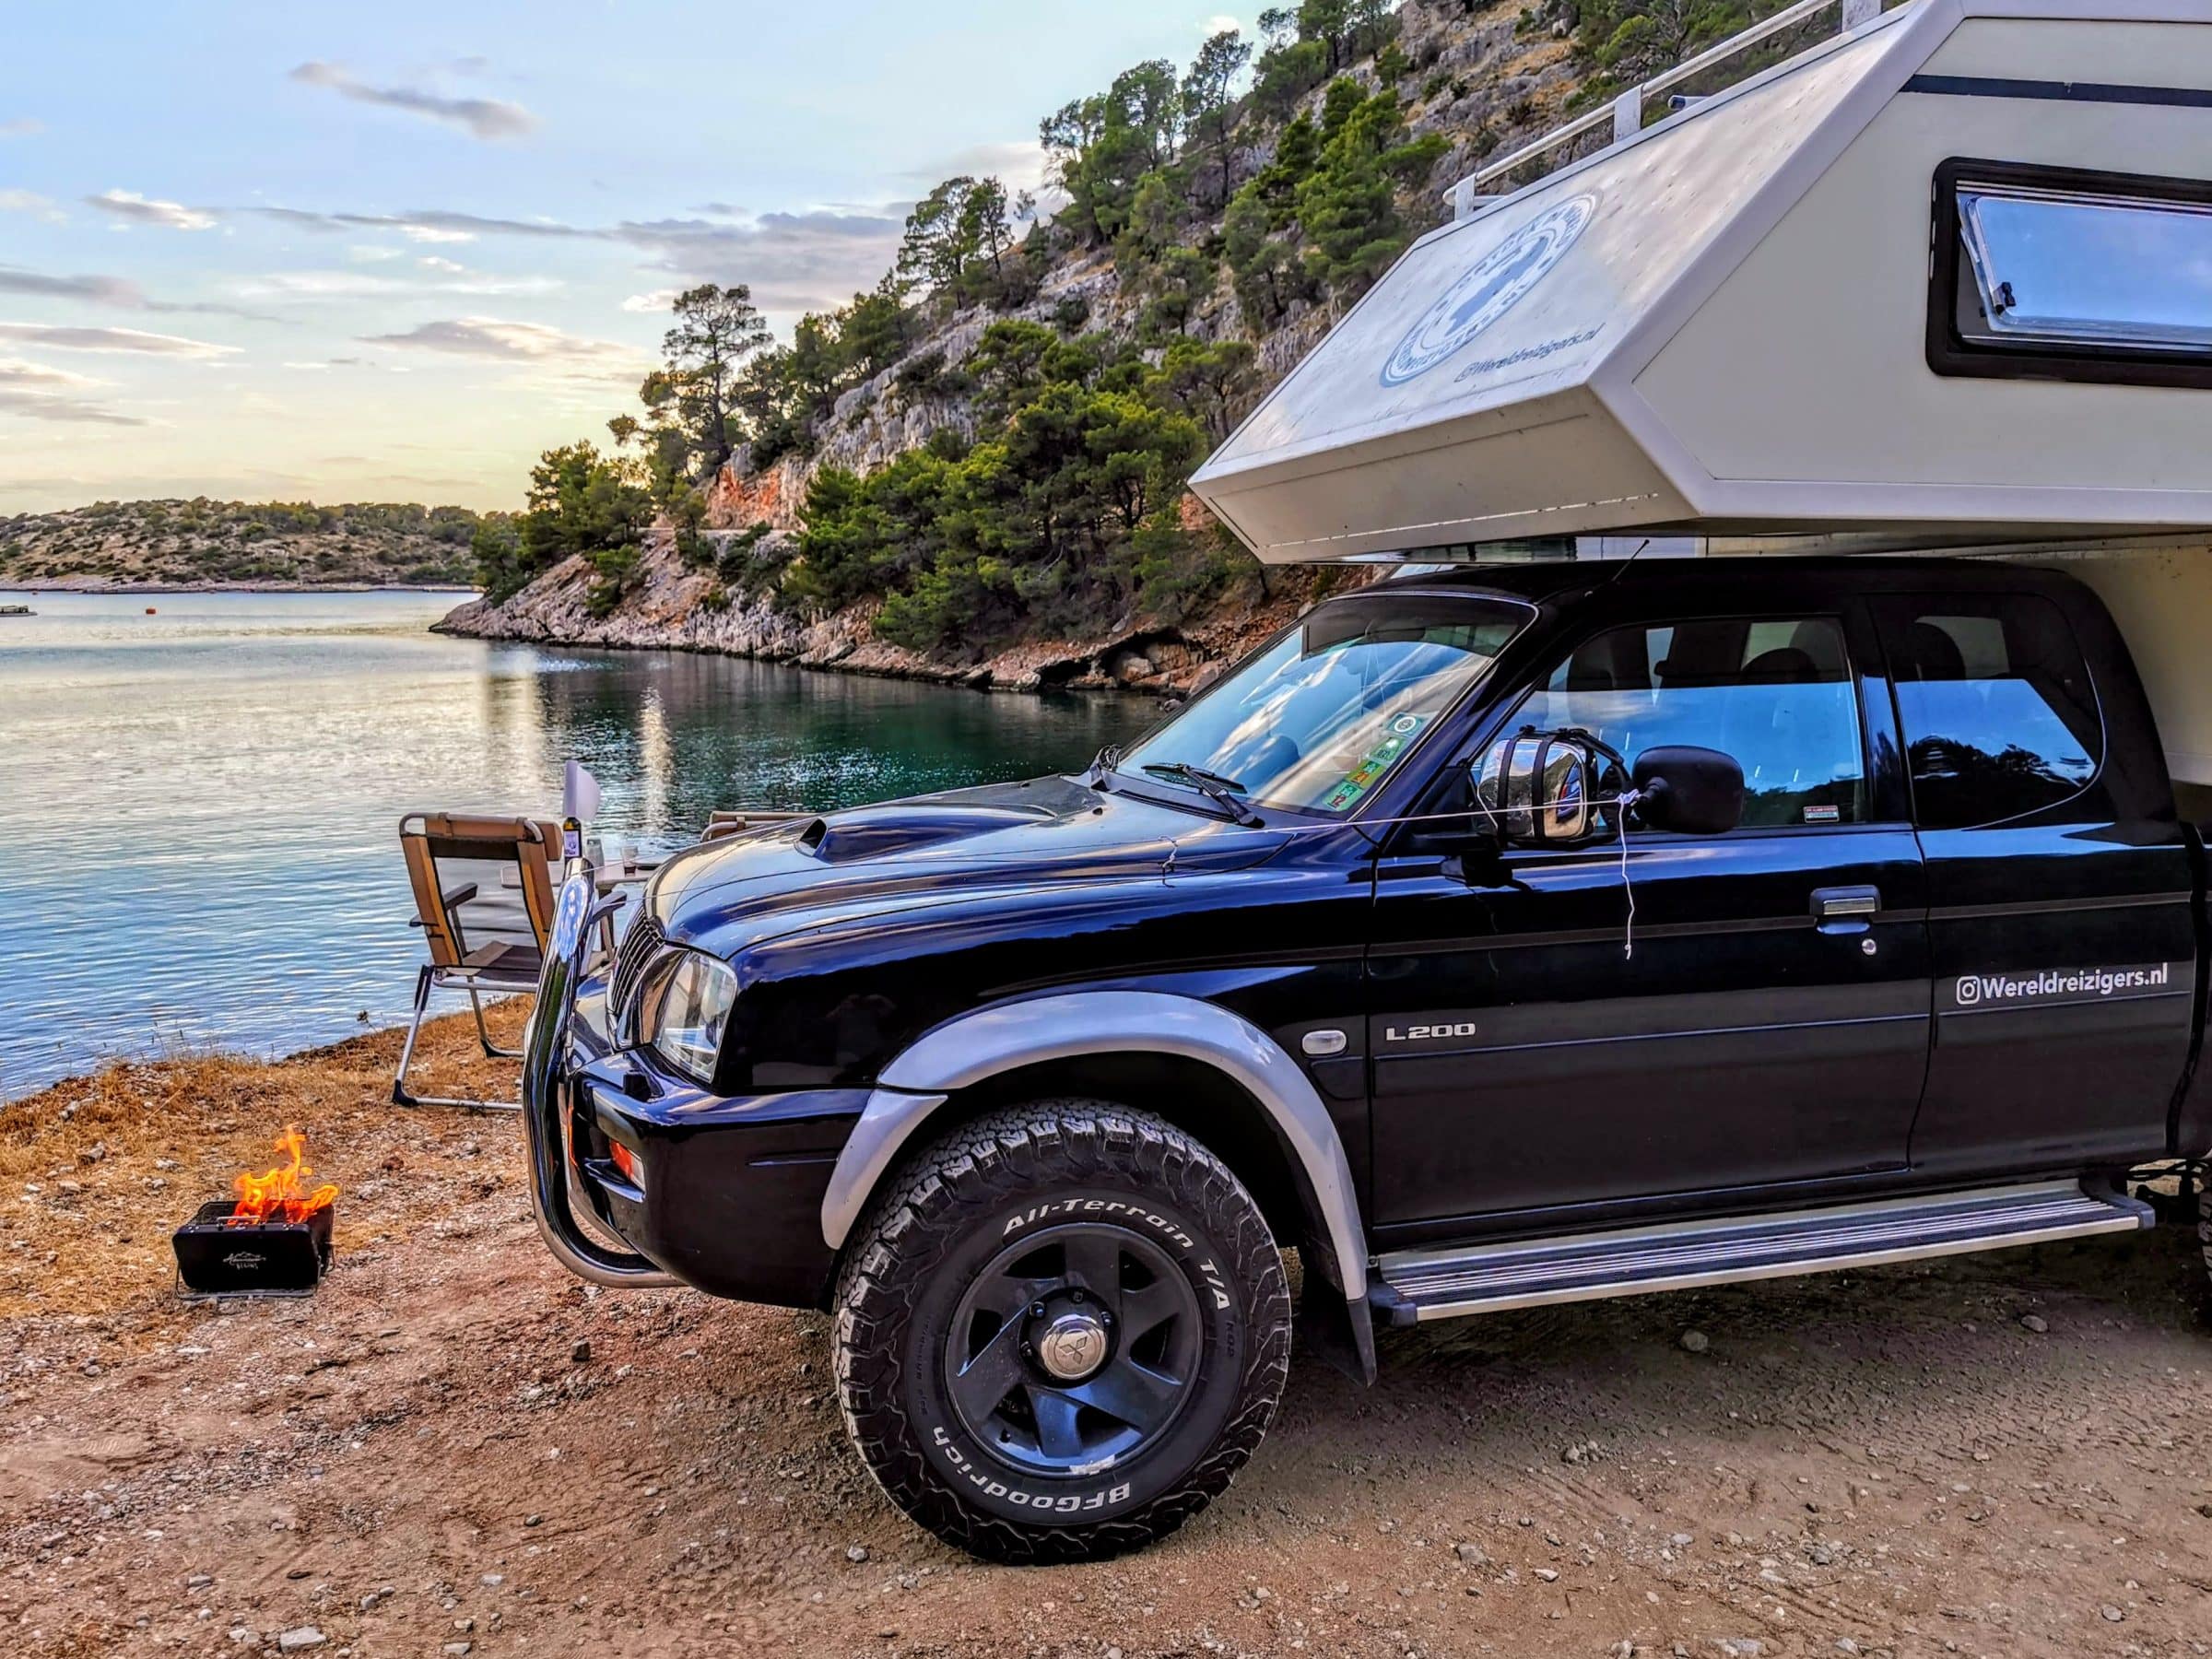
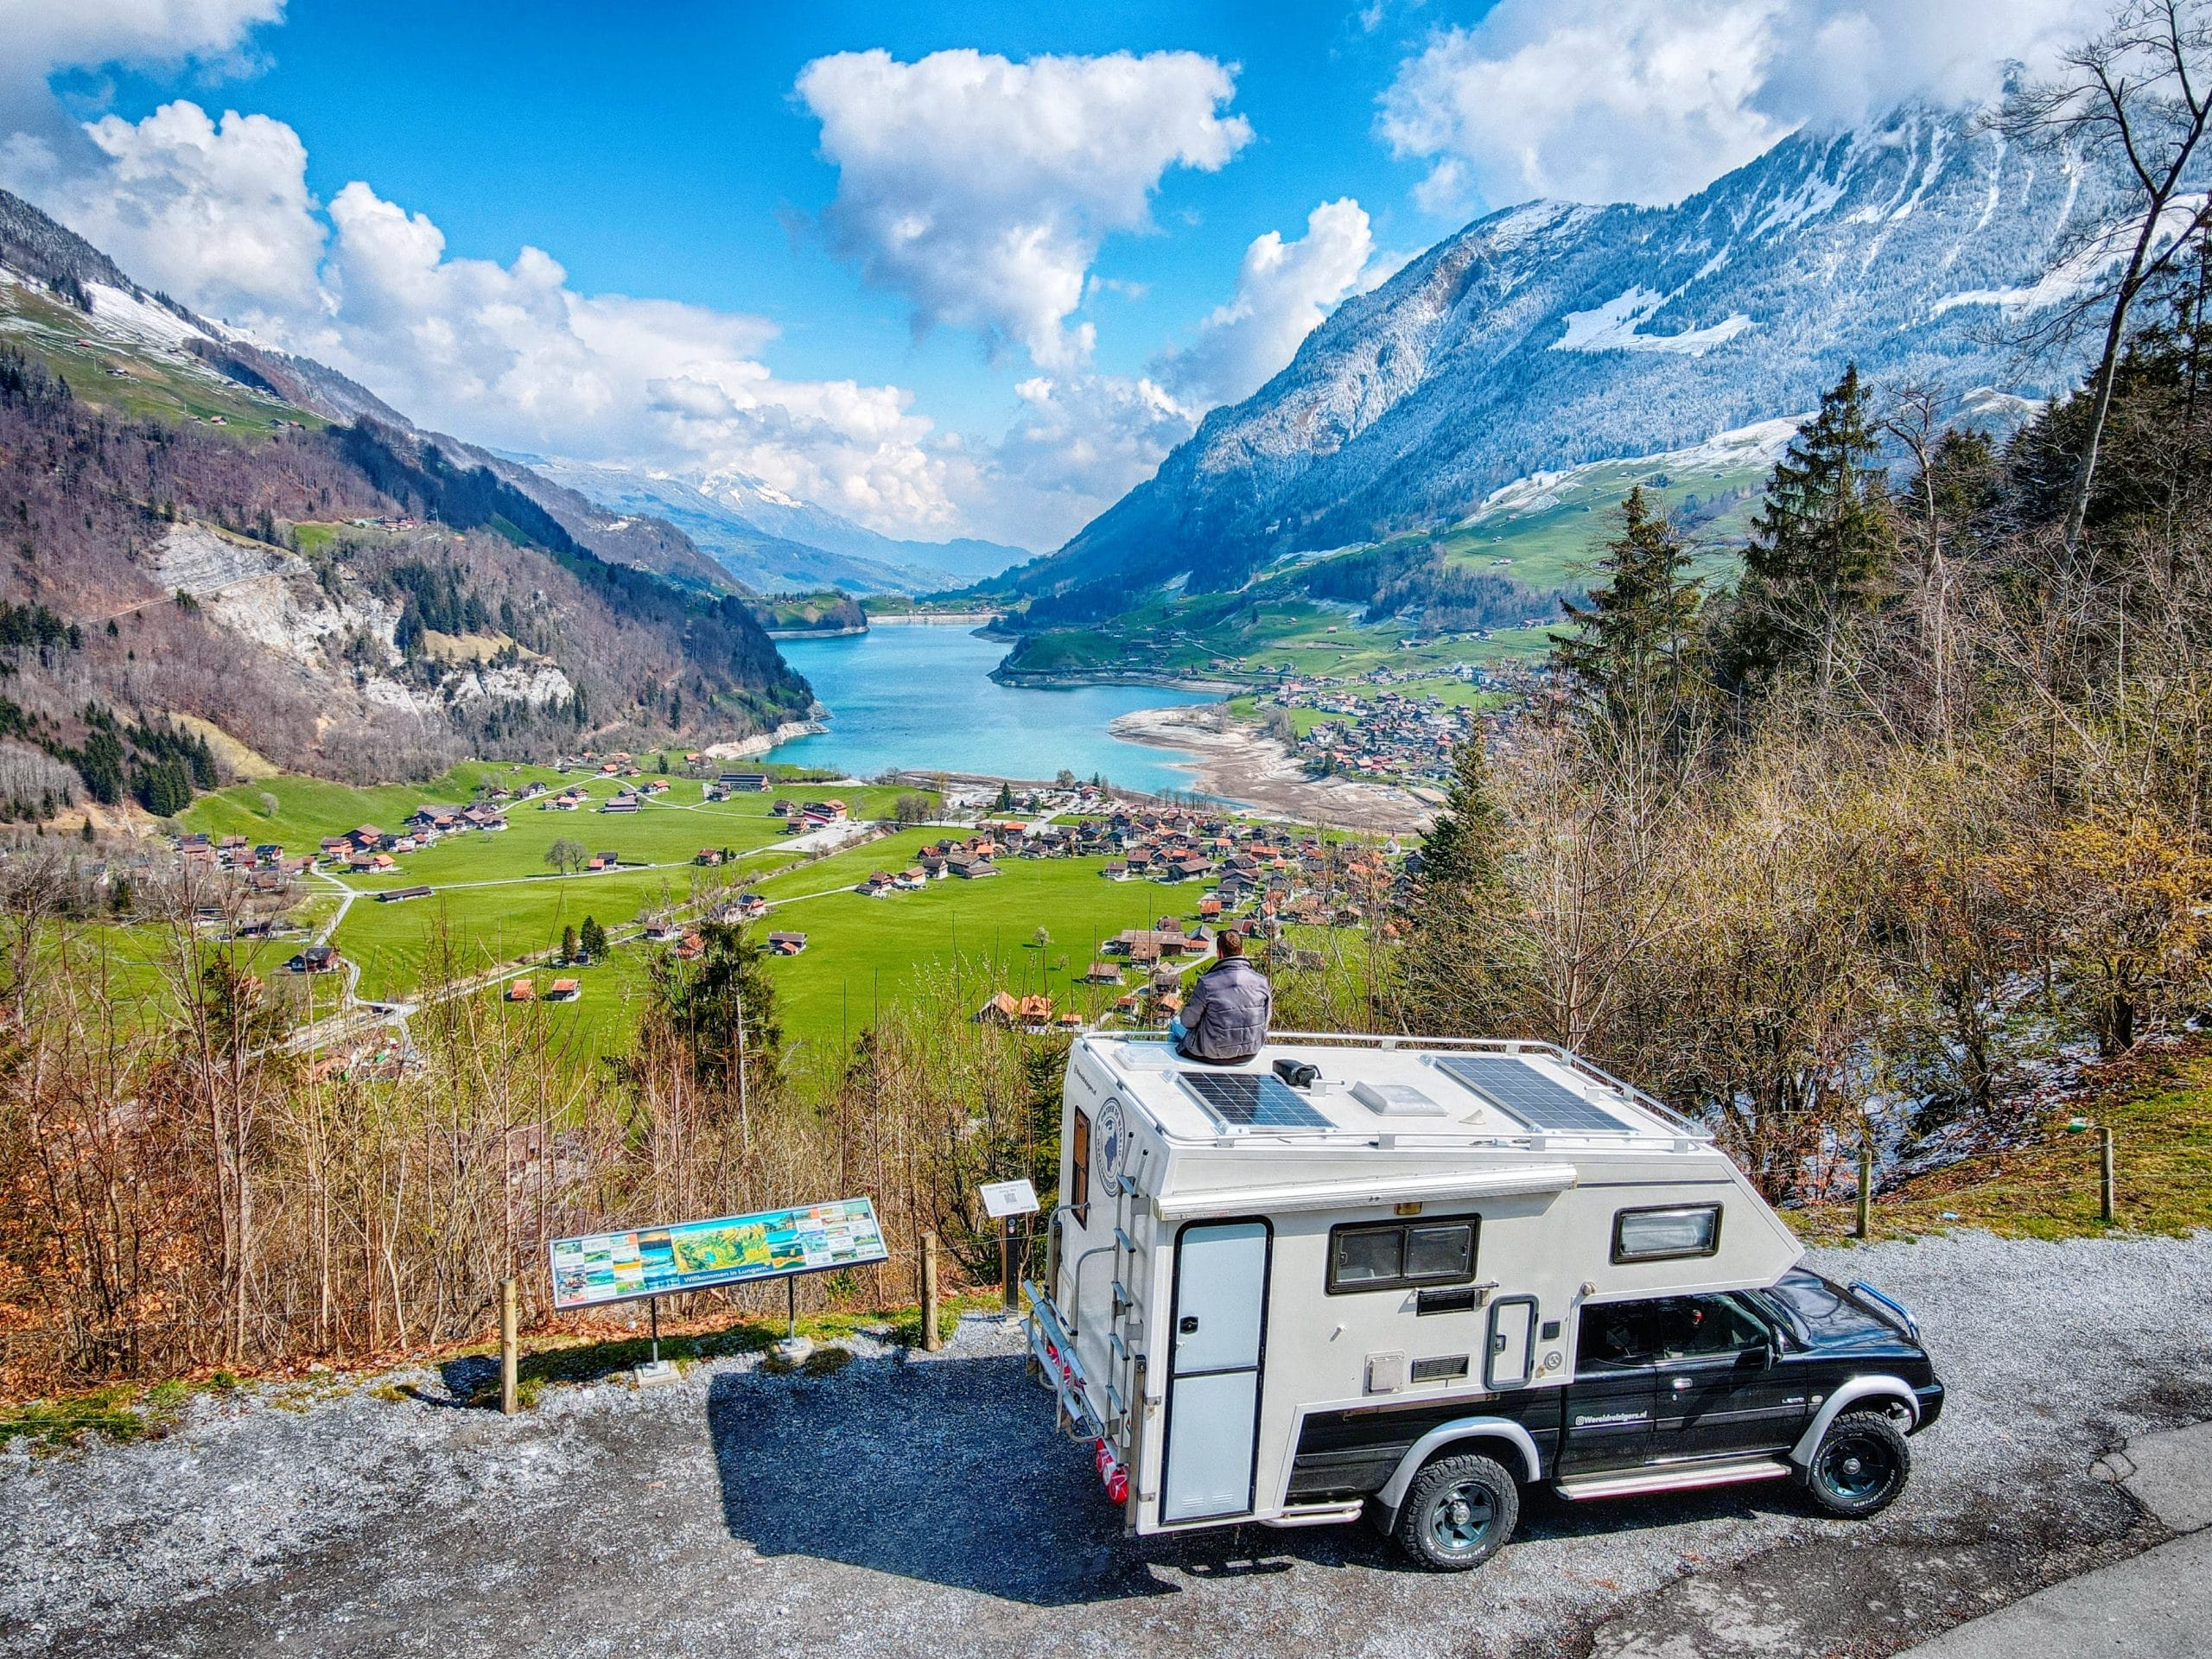
Our house on wheels is ready with the new interior and bathroom! We will start our own soon van life adventure, the roadtrip through America and Canada of one year. We have tackled the 4×4 world tour camper considerably and recently brought it to Antwerp. Here he will be on the boat ![]() to America
to America ![]() be loaded. Exciting! But now that he is finally on his way, we realize once again that a lot has happened before. We've had the camper for almost a year now!
be loaded. Exciting! But now that he is finally on his way, we realize once again that a lot has happened before. We've had the camper for almost a year now!
While traveling in Europe over the past year we have learned a lot about the vehicle. What it can do, but also what the limitations are. That is why we have recently started to improve things. We have extensively renovated and tinkered with the camper and we have also adjusted the bathroom and the interior quite a bit to make it completely as desired for the big trip.
Blood, sweat, money and tears have already gone into it, but we are very proud and happy with the end result! And because we have already done so much, we divide the blogs about the 4×4 camper into three parts. One about the bathroom and the interior, one about the gadgets and upgrades and one about the technology and upgrades of the car.
We start in part 1 with the interior. Are you curious why we chose this 4×4 motorhome around the world, what it looked like when we bought it and what we have renovated on the interior? Then read on quickly!
Also read: Our 4×4 world trip camper (2) | Gadgets & Upgrades
Also read: Our 4×4 world trip camper (3) | Technique and upgrades to car
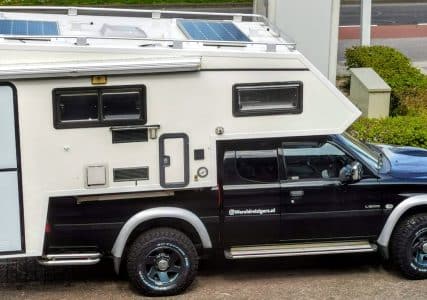
Why did we choose this 4×4 camper?
First of all, I will answer the question WHY we bought this motorhome. I don't know how often people have asked me why I bought such a 'weird' camper and not a 'normal' camper or bus camper.
The looks
I always say… just look at it† Isn't this device just great to look at? You never see them in Europe and because it is so unique, people immediately look at your car with amazement. Many people (usually men) also show interest and ask questions right away, which is often a nice icebreaker. You immediately feel welcome everywhere and that is nice.
The detachable living unit
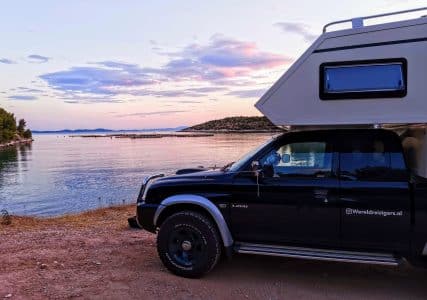
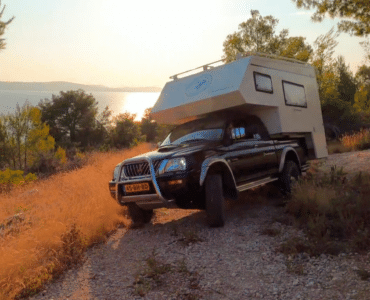
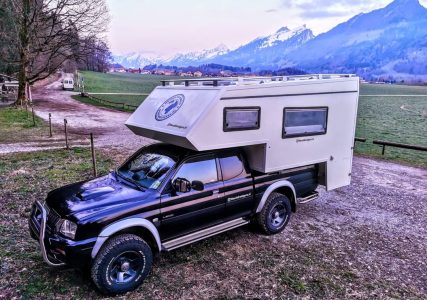
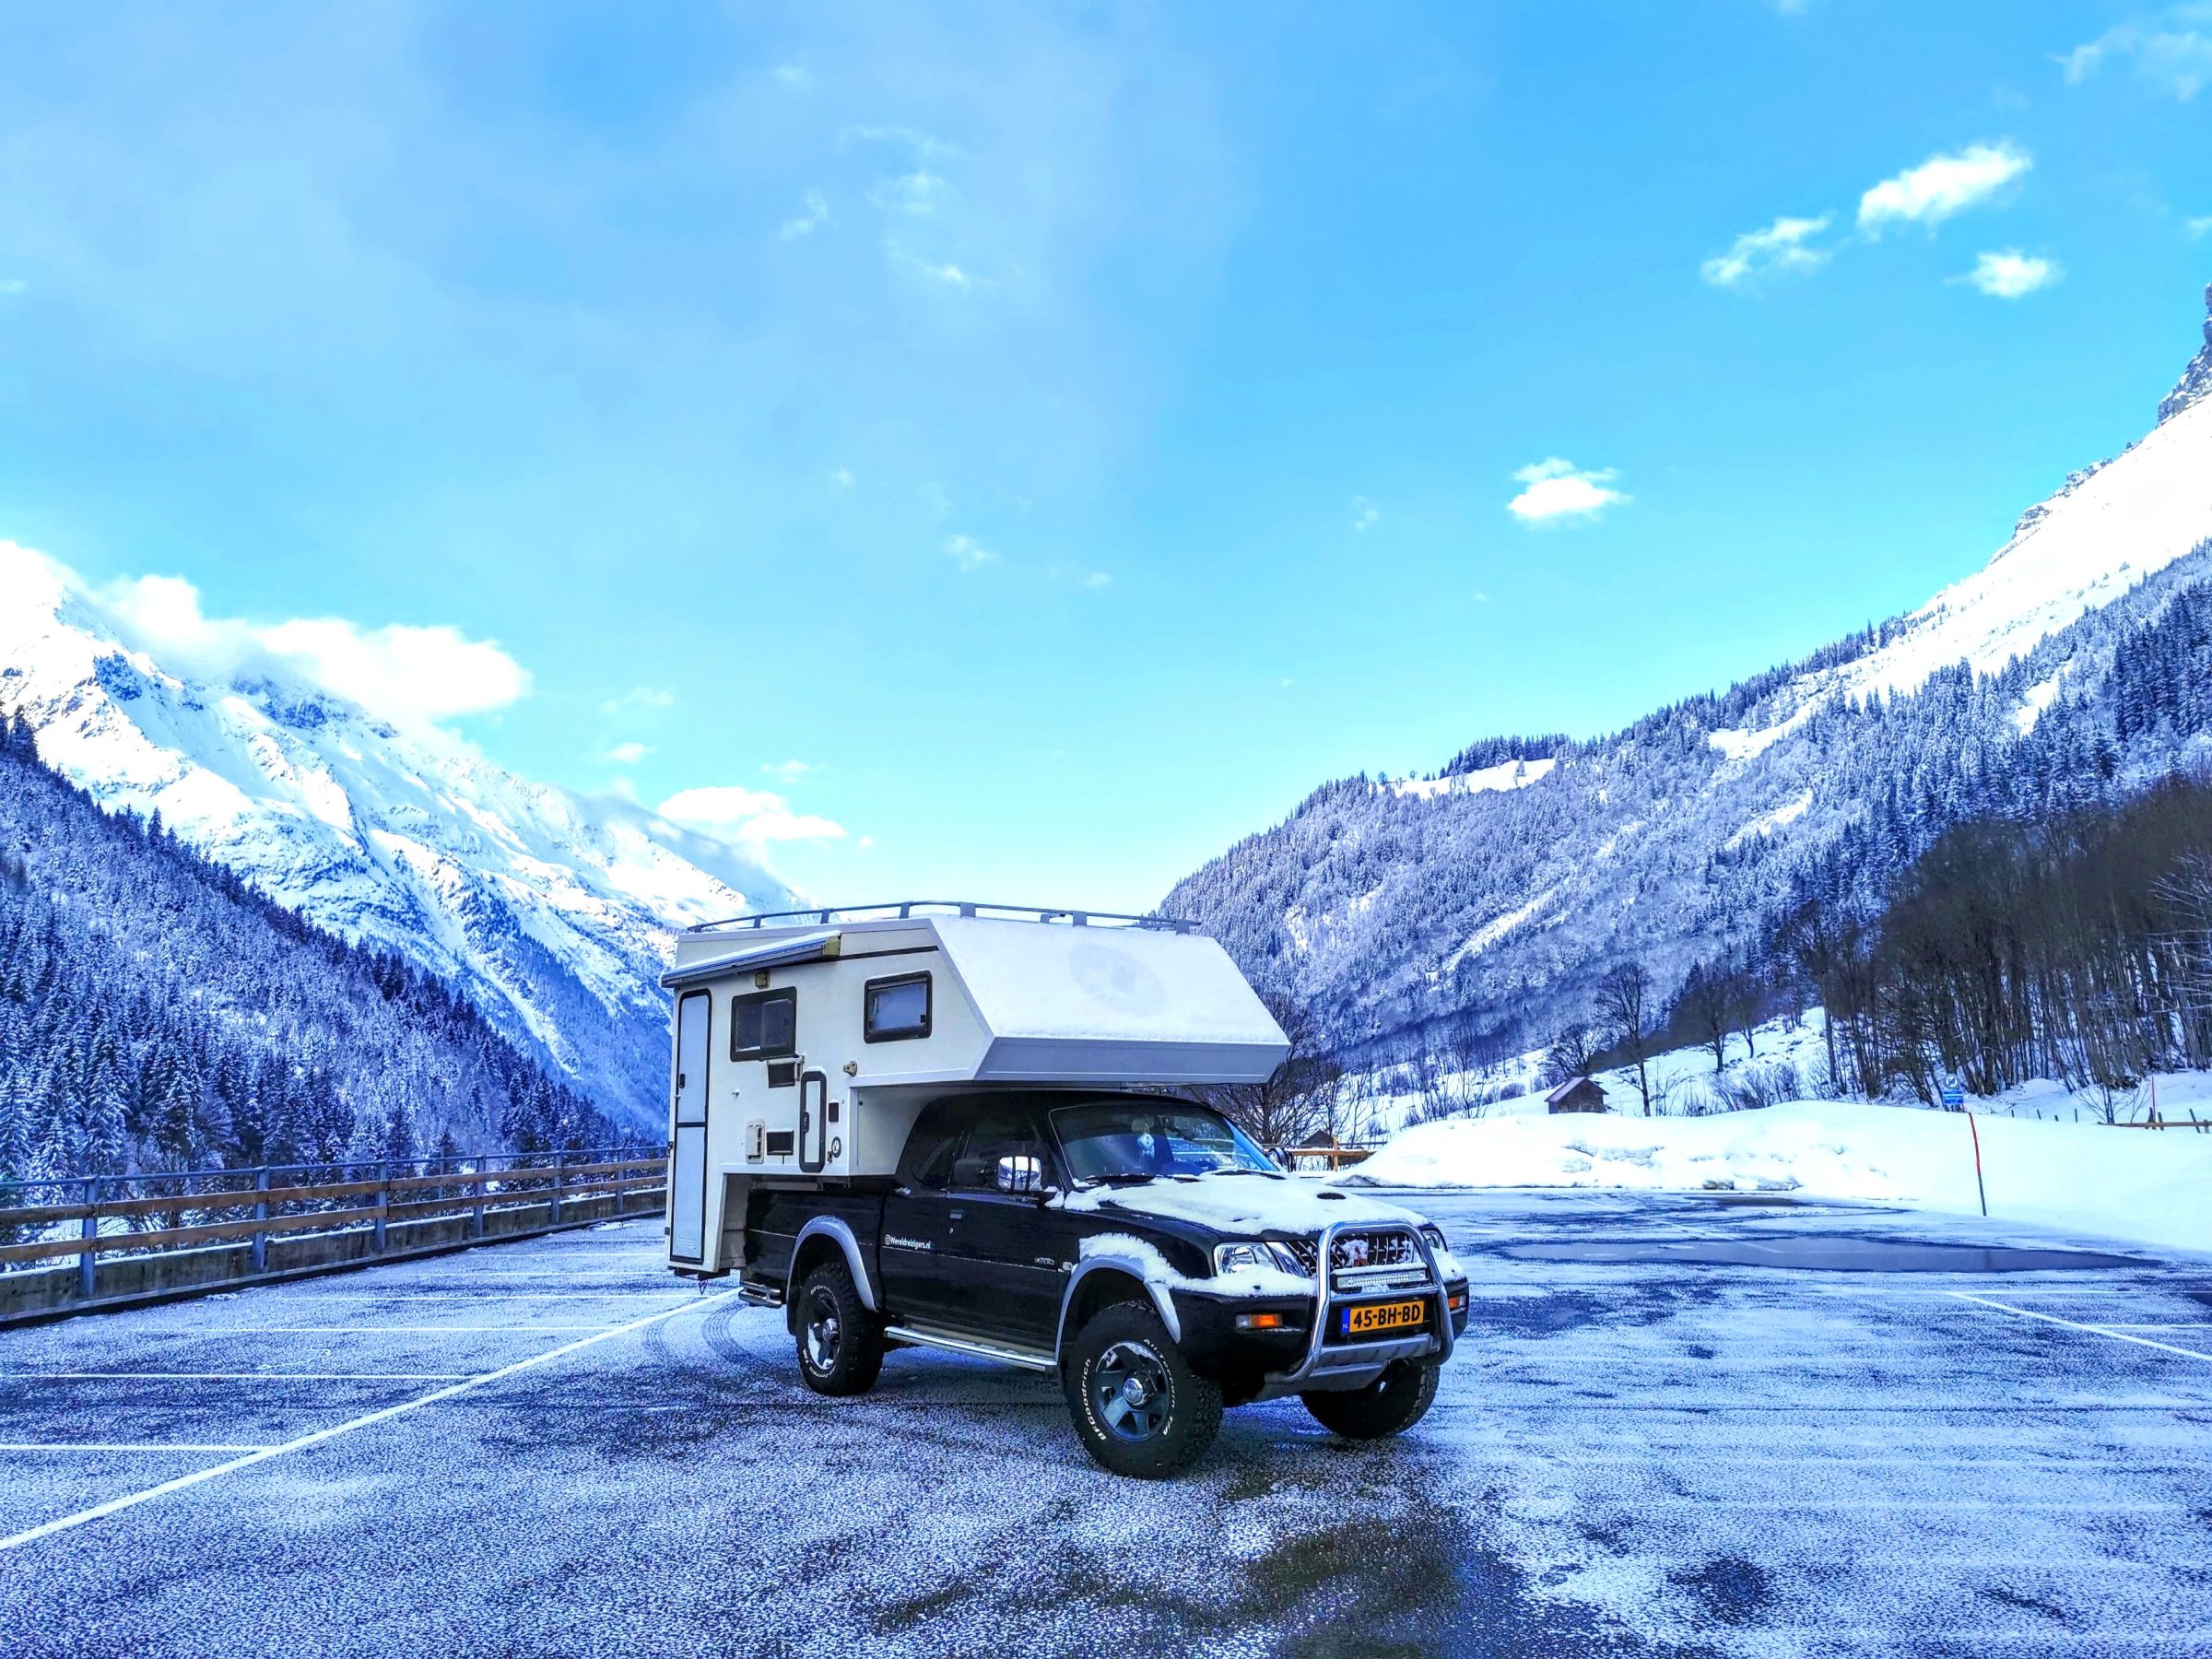
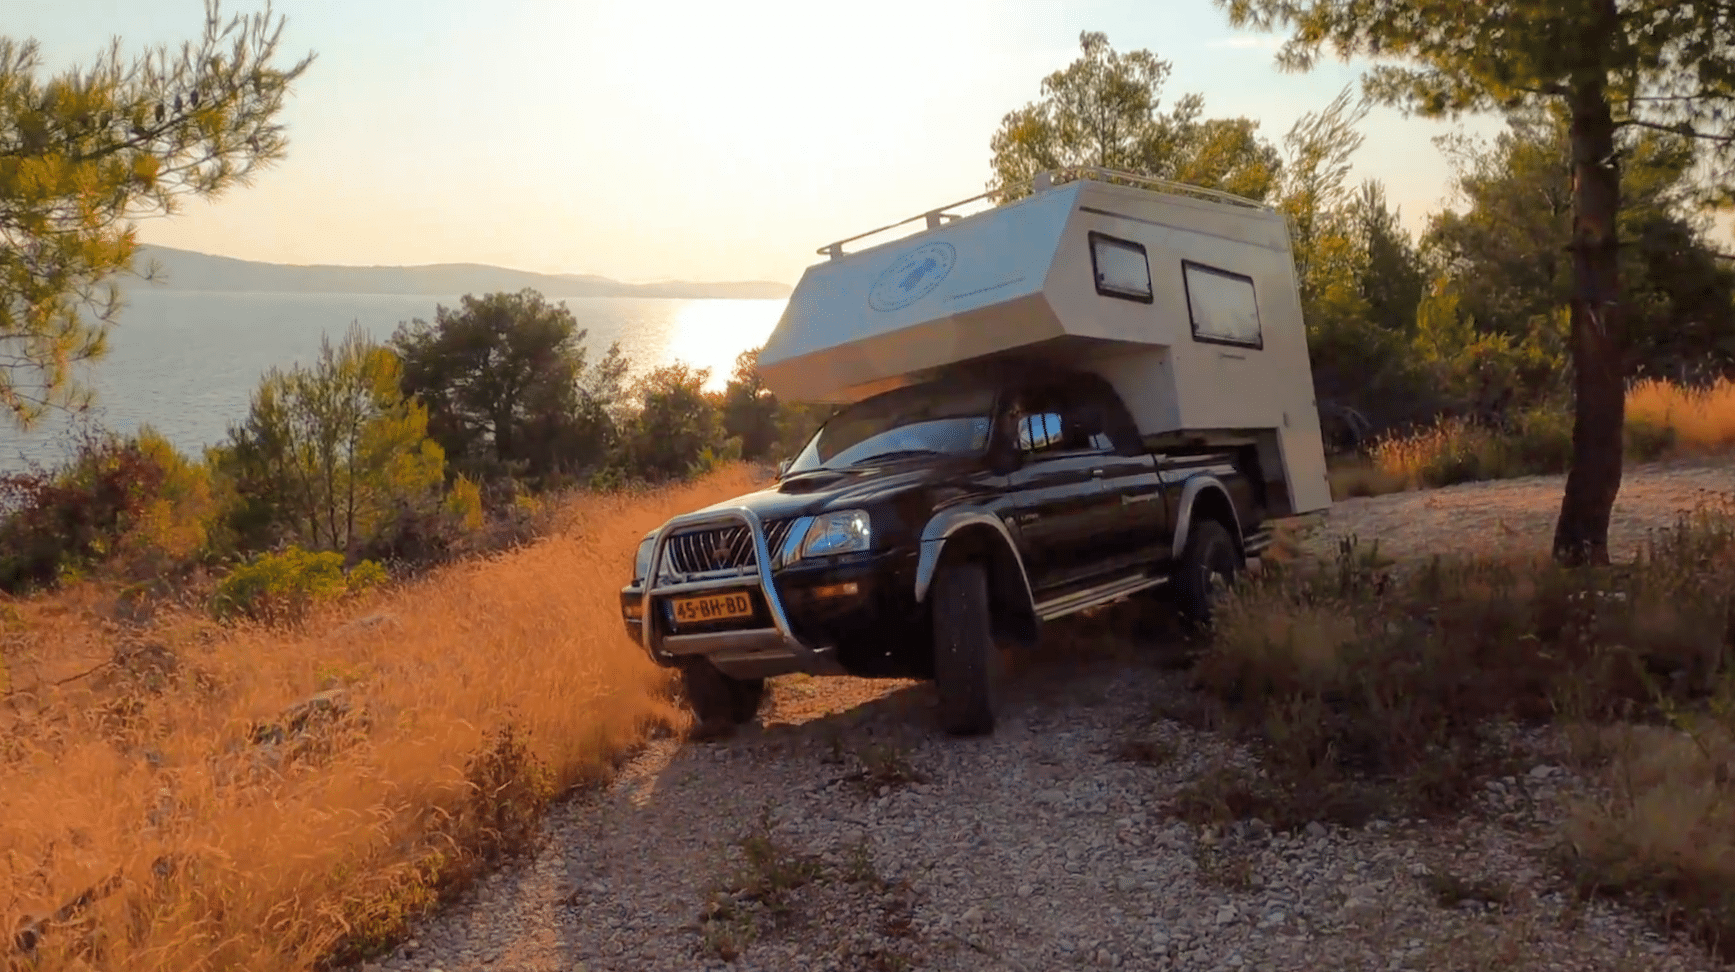
But seriously… Yes, we think he's very cool. But what makes him tough also has to do with what he can do. It is a solid Mitsubishi L200 4×4 pickup truck that stands high on the wheels, has large off-road tires and has a separate camping unit (deposit unit) on the body that can also be removed if we want to stay somewhere longer.
The off-road capabilities & comfort
The off-road capabilities are therefore important to us because we want to travel to places where you can't just come with a normal car or camper. Yes, we know that the heavy weight of the camping unit severely limits its off-road capability. It is by no means an ultimate off-roader and we must therefore always be careful when going off the paved road. But as far as we're concerned, this is the perfect middle ground. The car has reasonable off-road capabilities without having to compromise on the comfortable living space.
Comfort is also important to us, especially when we are traveling for a longer period of time. For example, we absolutely did not want a bed that you have to fold and make every day, because it is also the table at which you eat or work. You see this a lot in bus campers and we absolutely did not want this. Anyway, for us this is the perfect camper!
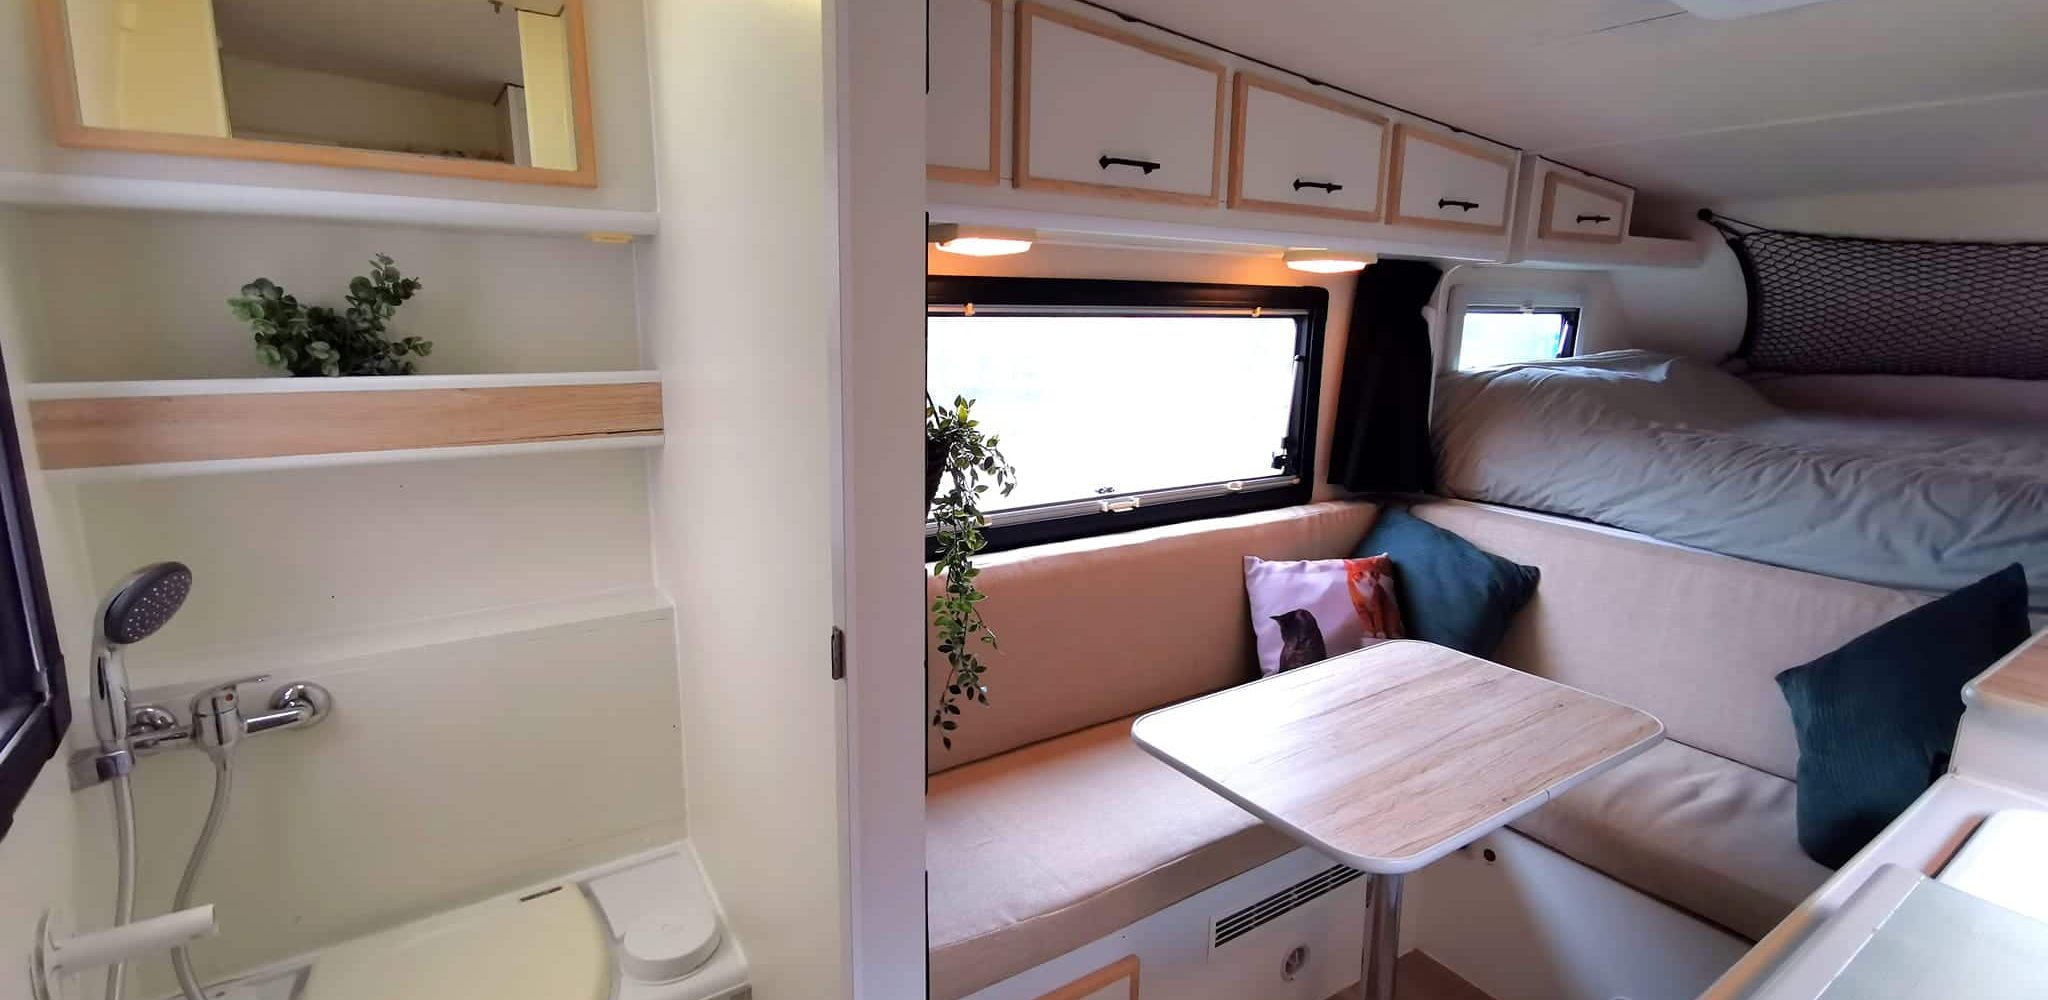
The interior and the bathroom
We bought the motorhome last year from an owner who has always been very careful with it. But of course there were also plenty of things that we still wanted to adjust or improve on the camper. In the past year, for example, we have made a number of adjustments that increase living comfort and we have also adapted the interior so that it better matches our personal wishes and style.
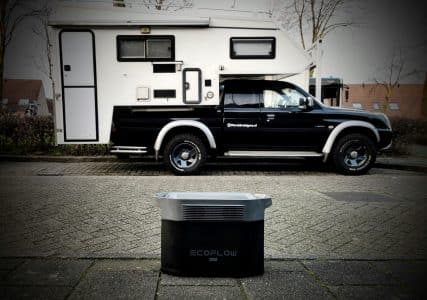
The hidden upgrades that you can't see include the new electric hot water boiler and the huge lithium battery pack that has been installed. These are invisible but essential upgrades for our long journey because they ensure that we extended off grid can camp without any facilities† I will tell you all about this in the 2nd blog about our camper.
In this article I will show you what we have changed in the bathroom and the rest of the interior, both visually and practically. In terms of styling, we have made quite a few adjustments because we wanted to furnish the camper to our own taste. After all, we are going to live there for at least a whole year!
In short, this is the list of upgrades/changes to the bathroom and interior of the motorhome:
- The bathroom renovated
- Piece removed from bench to create more standing/walking space.
- Sofa reupholstered
- New black curtains
- Frames sprayed black
- Black storage nets installed
- What shades of green: pillows and bed
- More wood tones (vinyl) and frames
- Hanging wooden spice racks
- New wood look PVC floor
Below I will explain in detail what we did exactly, including accompanying photos.
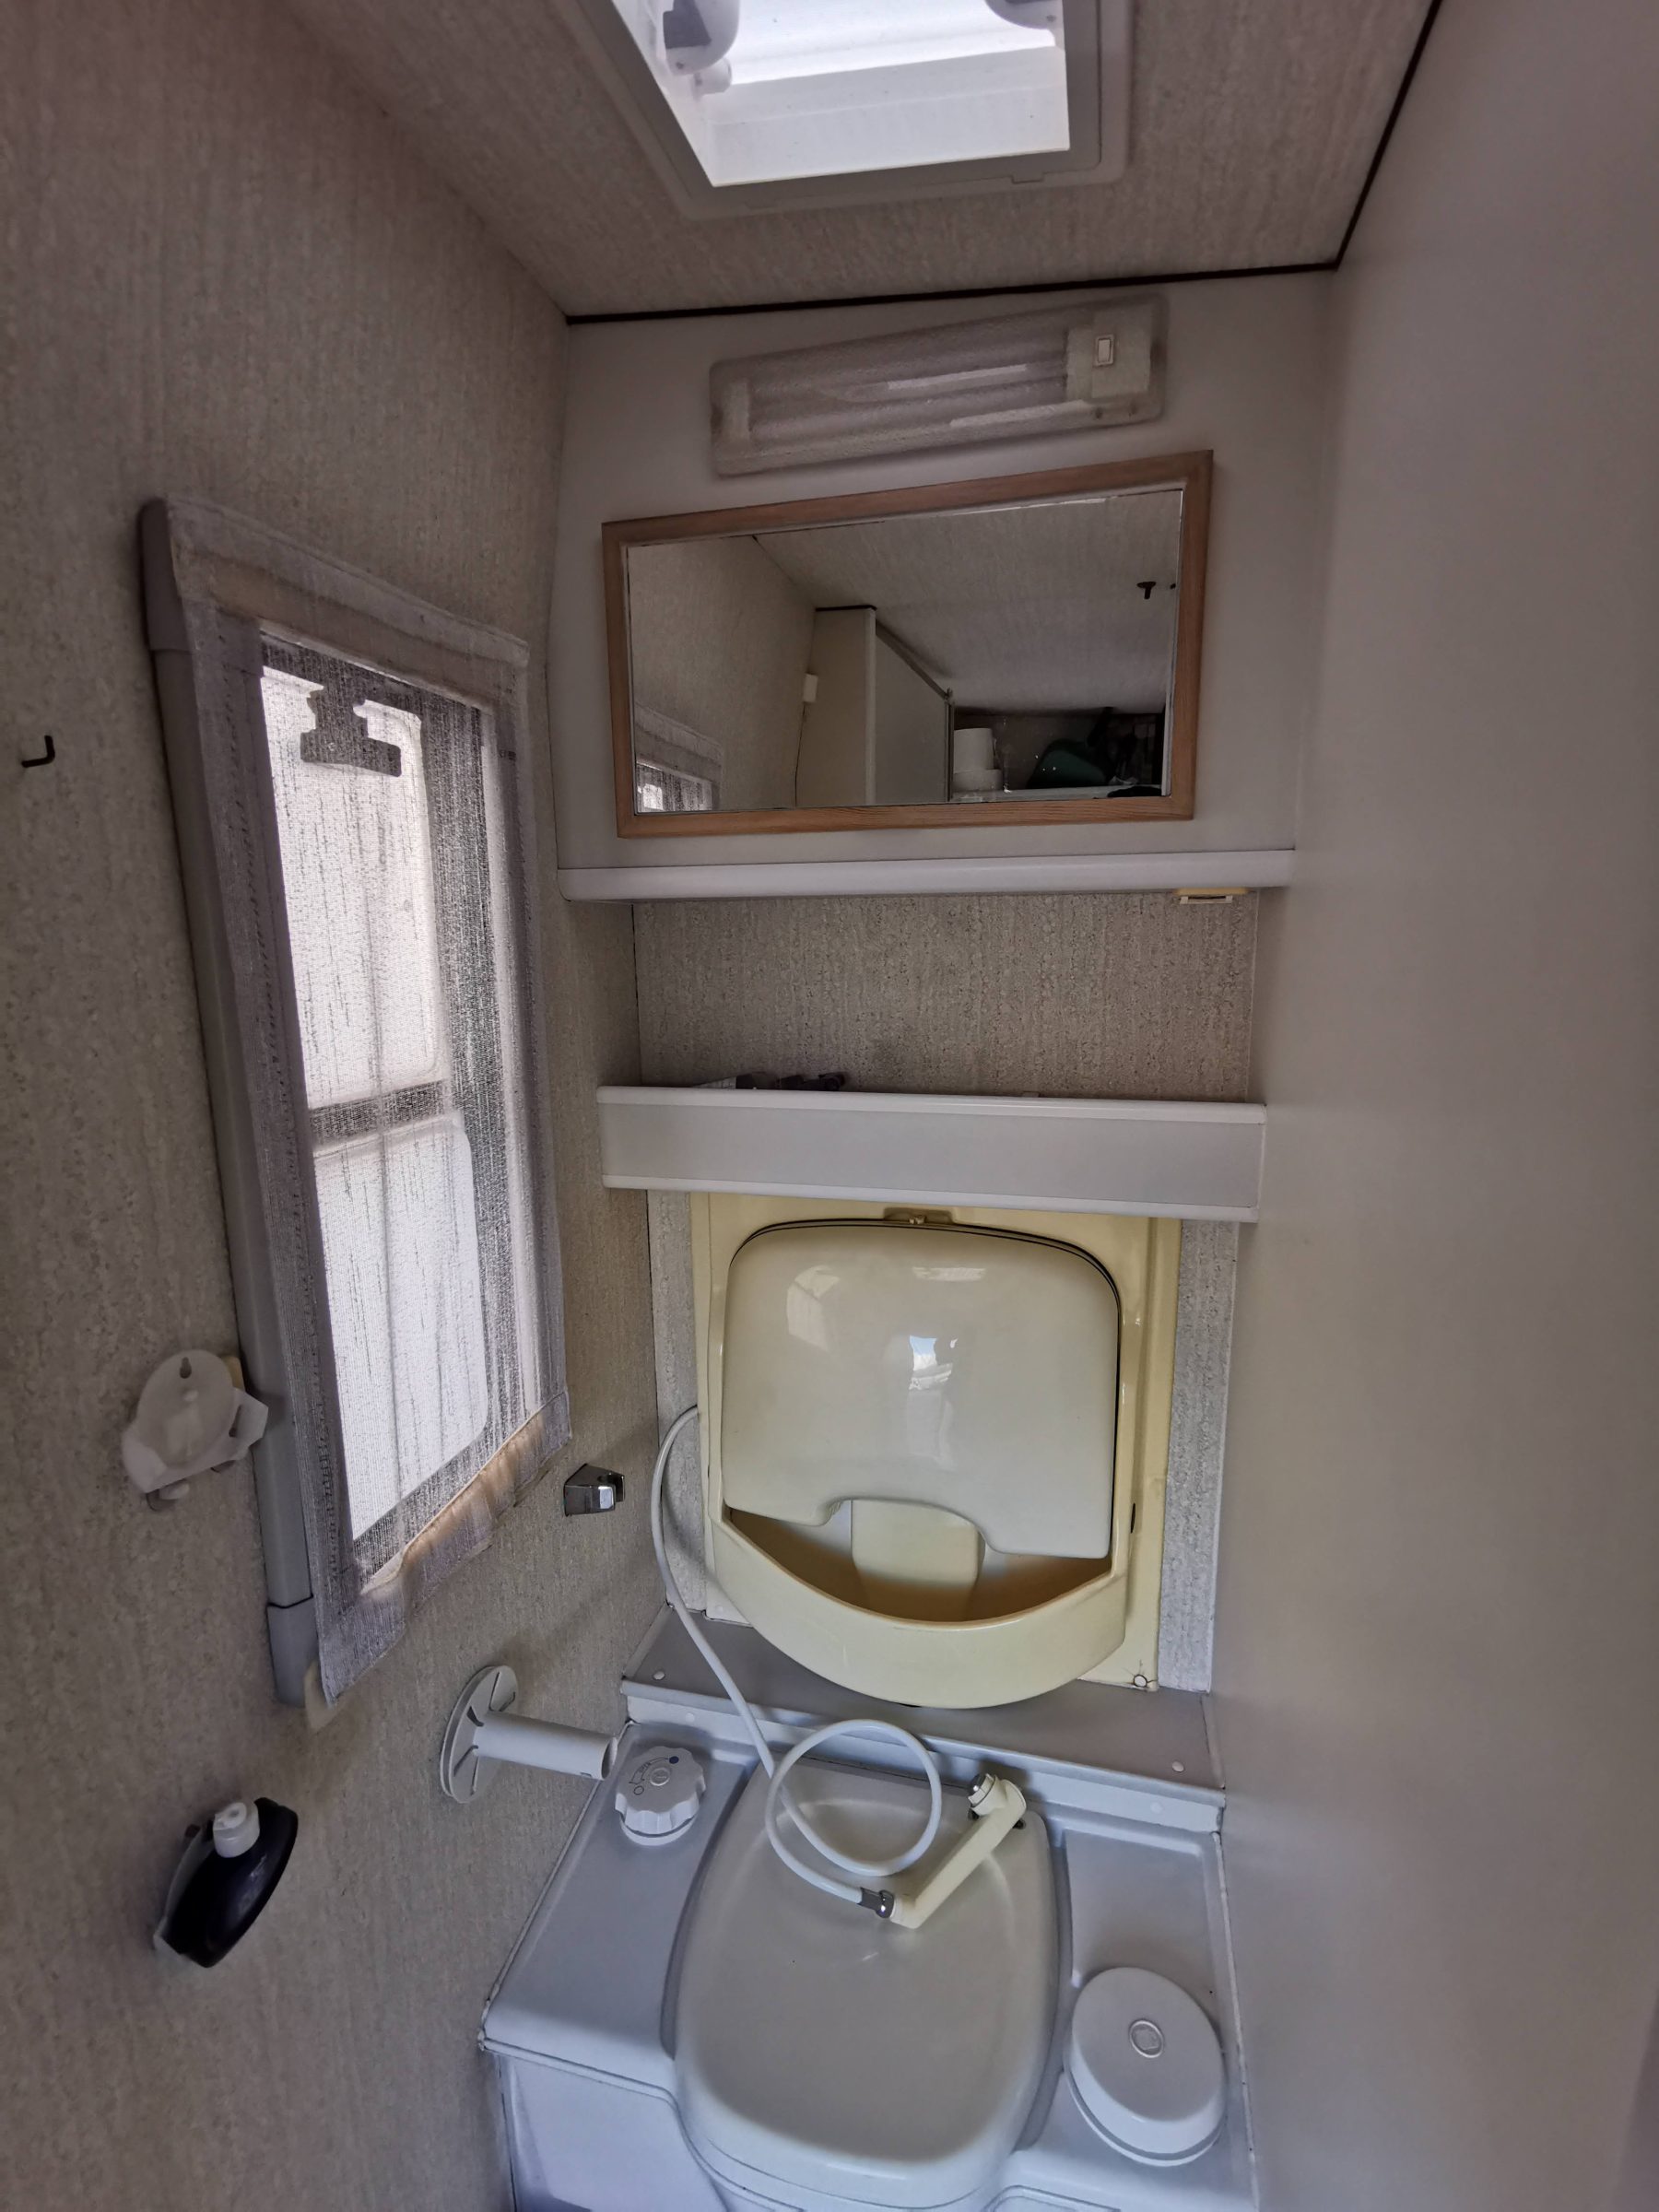
Renovate the bathroom
First of all, we partly demolished the old shower cubicle, if you could call it that, and rebuilt it. The toilet and sink were very dated and worn, they really needed to be replaced. We also found it unnecessary to have two sinks in a camper of a few square meters. After all, we can also brush our teeth and wash our hands in the sink of the kitchen, right?
This is how we found the shower cubicle when we just bought the motorhome.
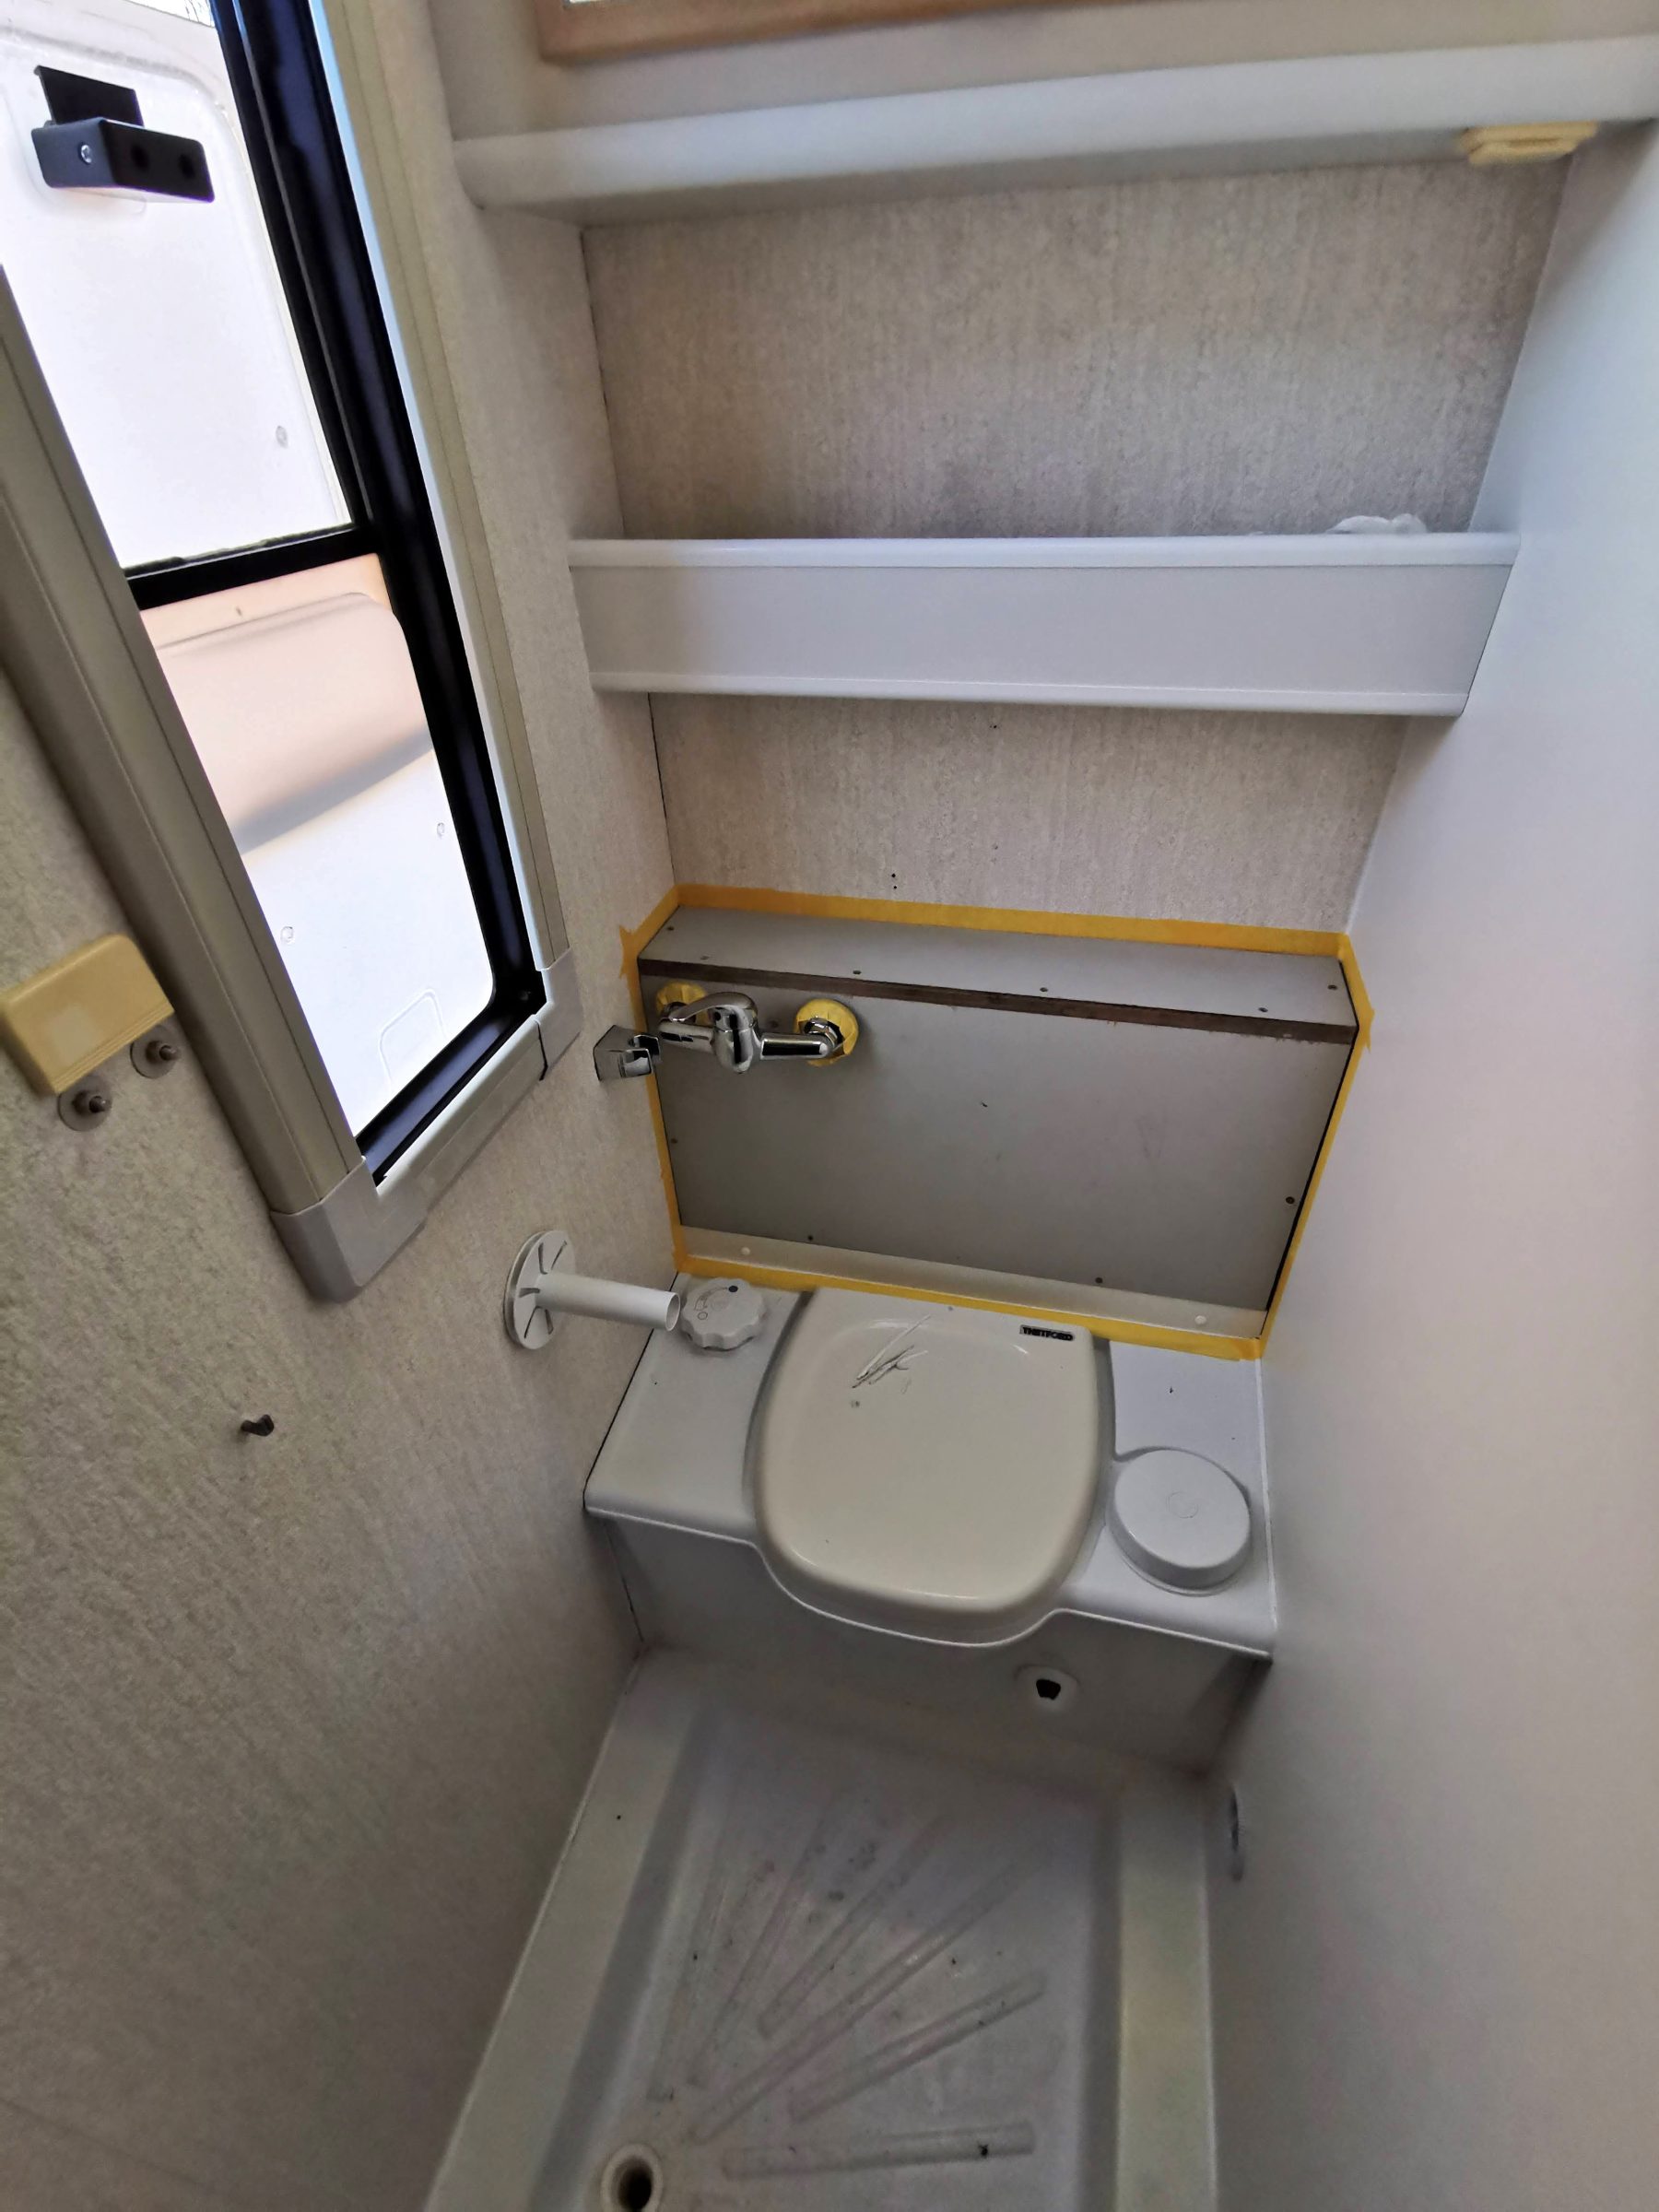
Remove the sink, finish it and place a new tap
We demolished the old sink and tap and then everything was neatly finished. We have mounted a new tap and shower head on the fresh carpentry, see the photo of the work below.
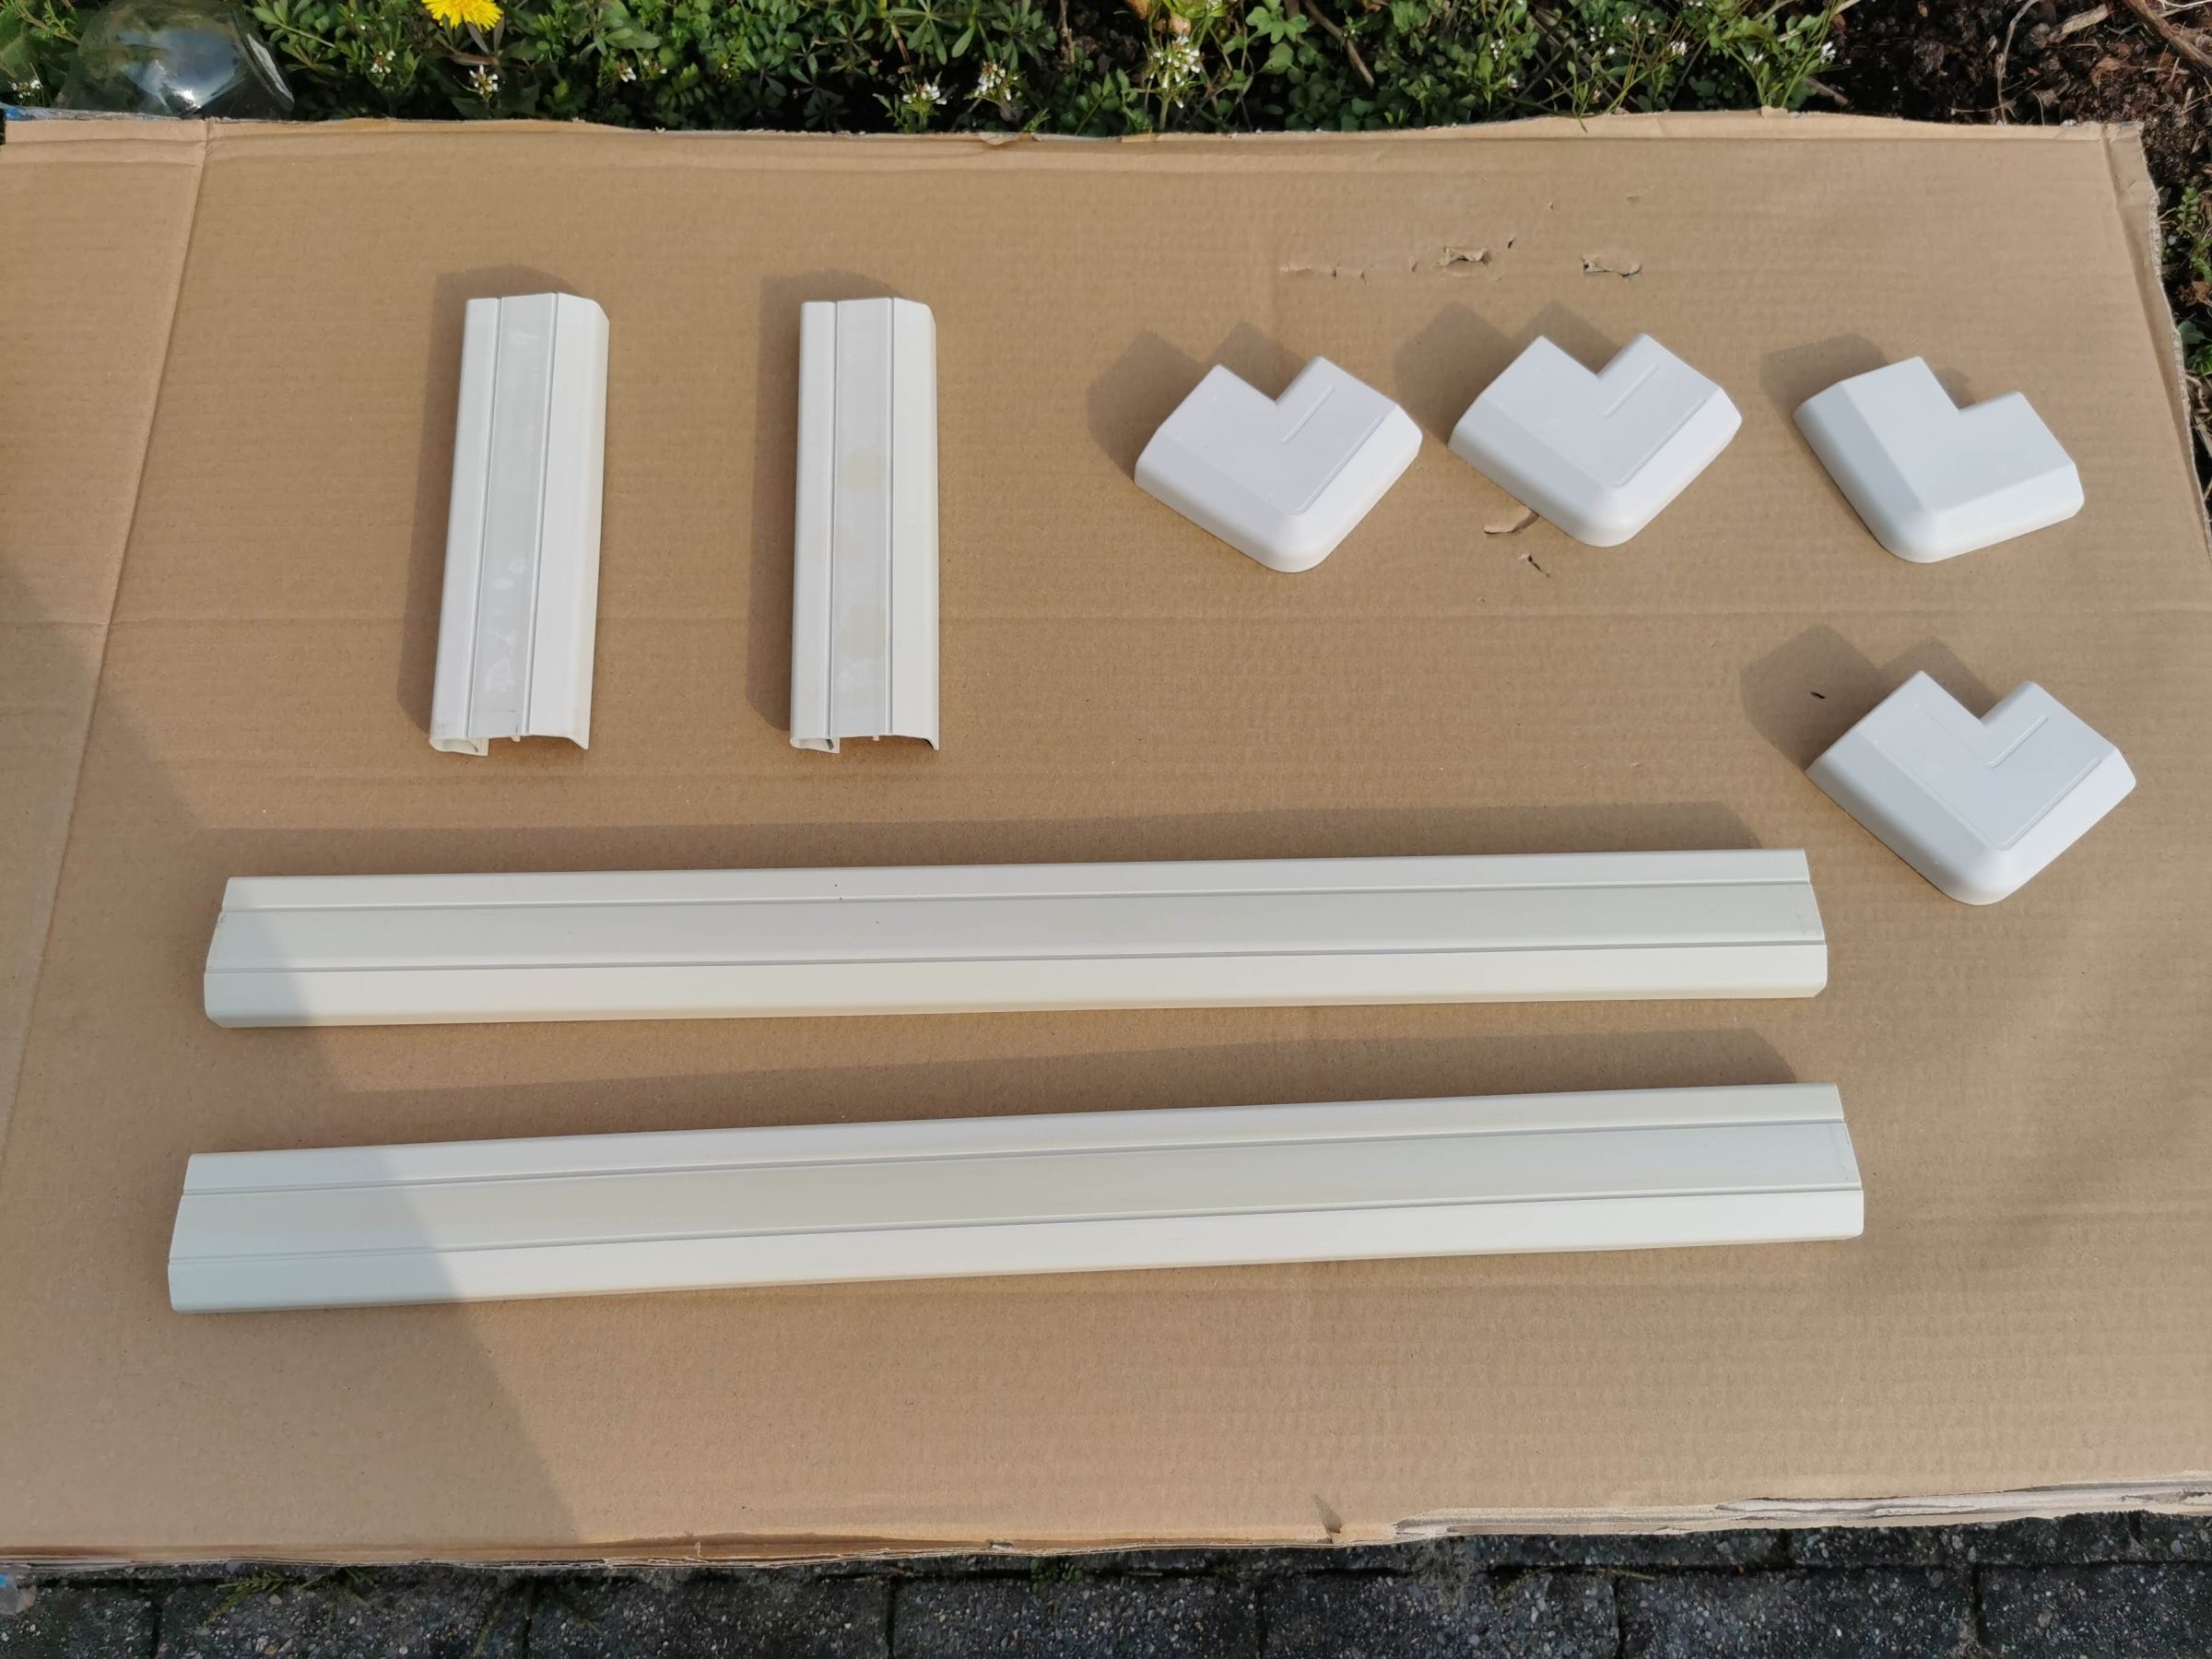
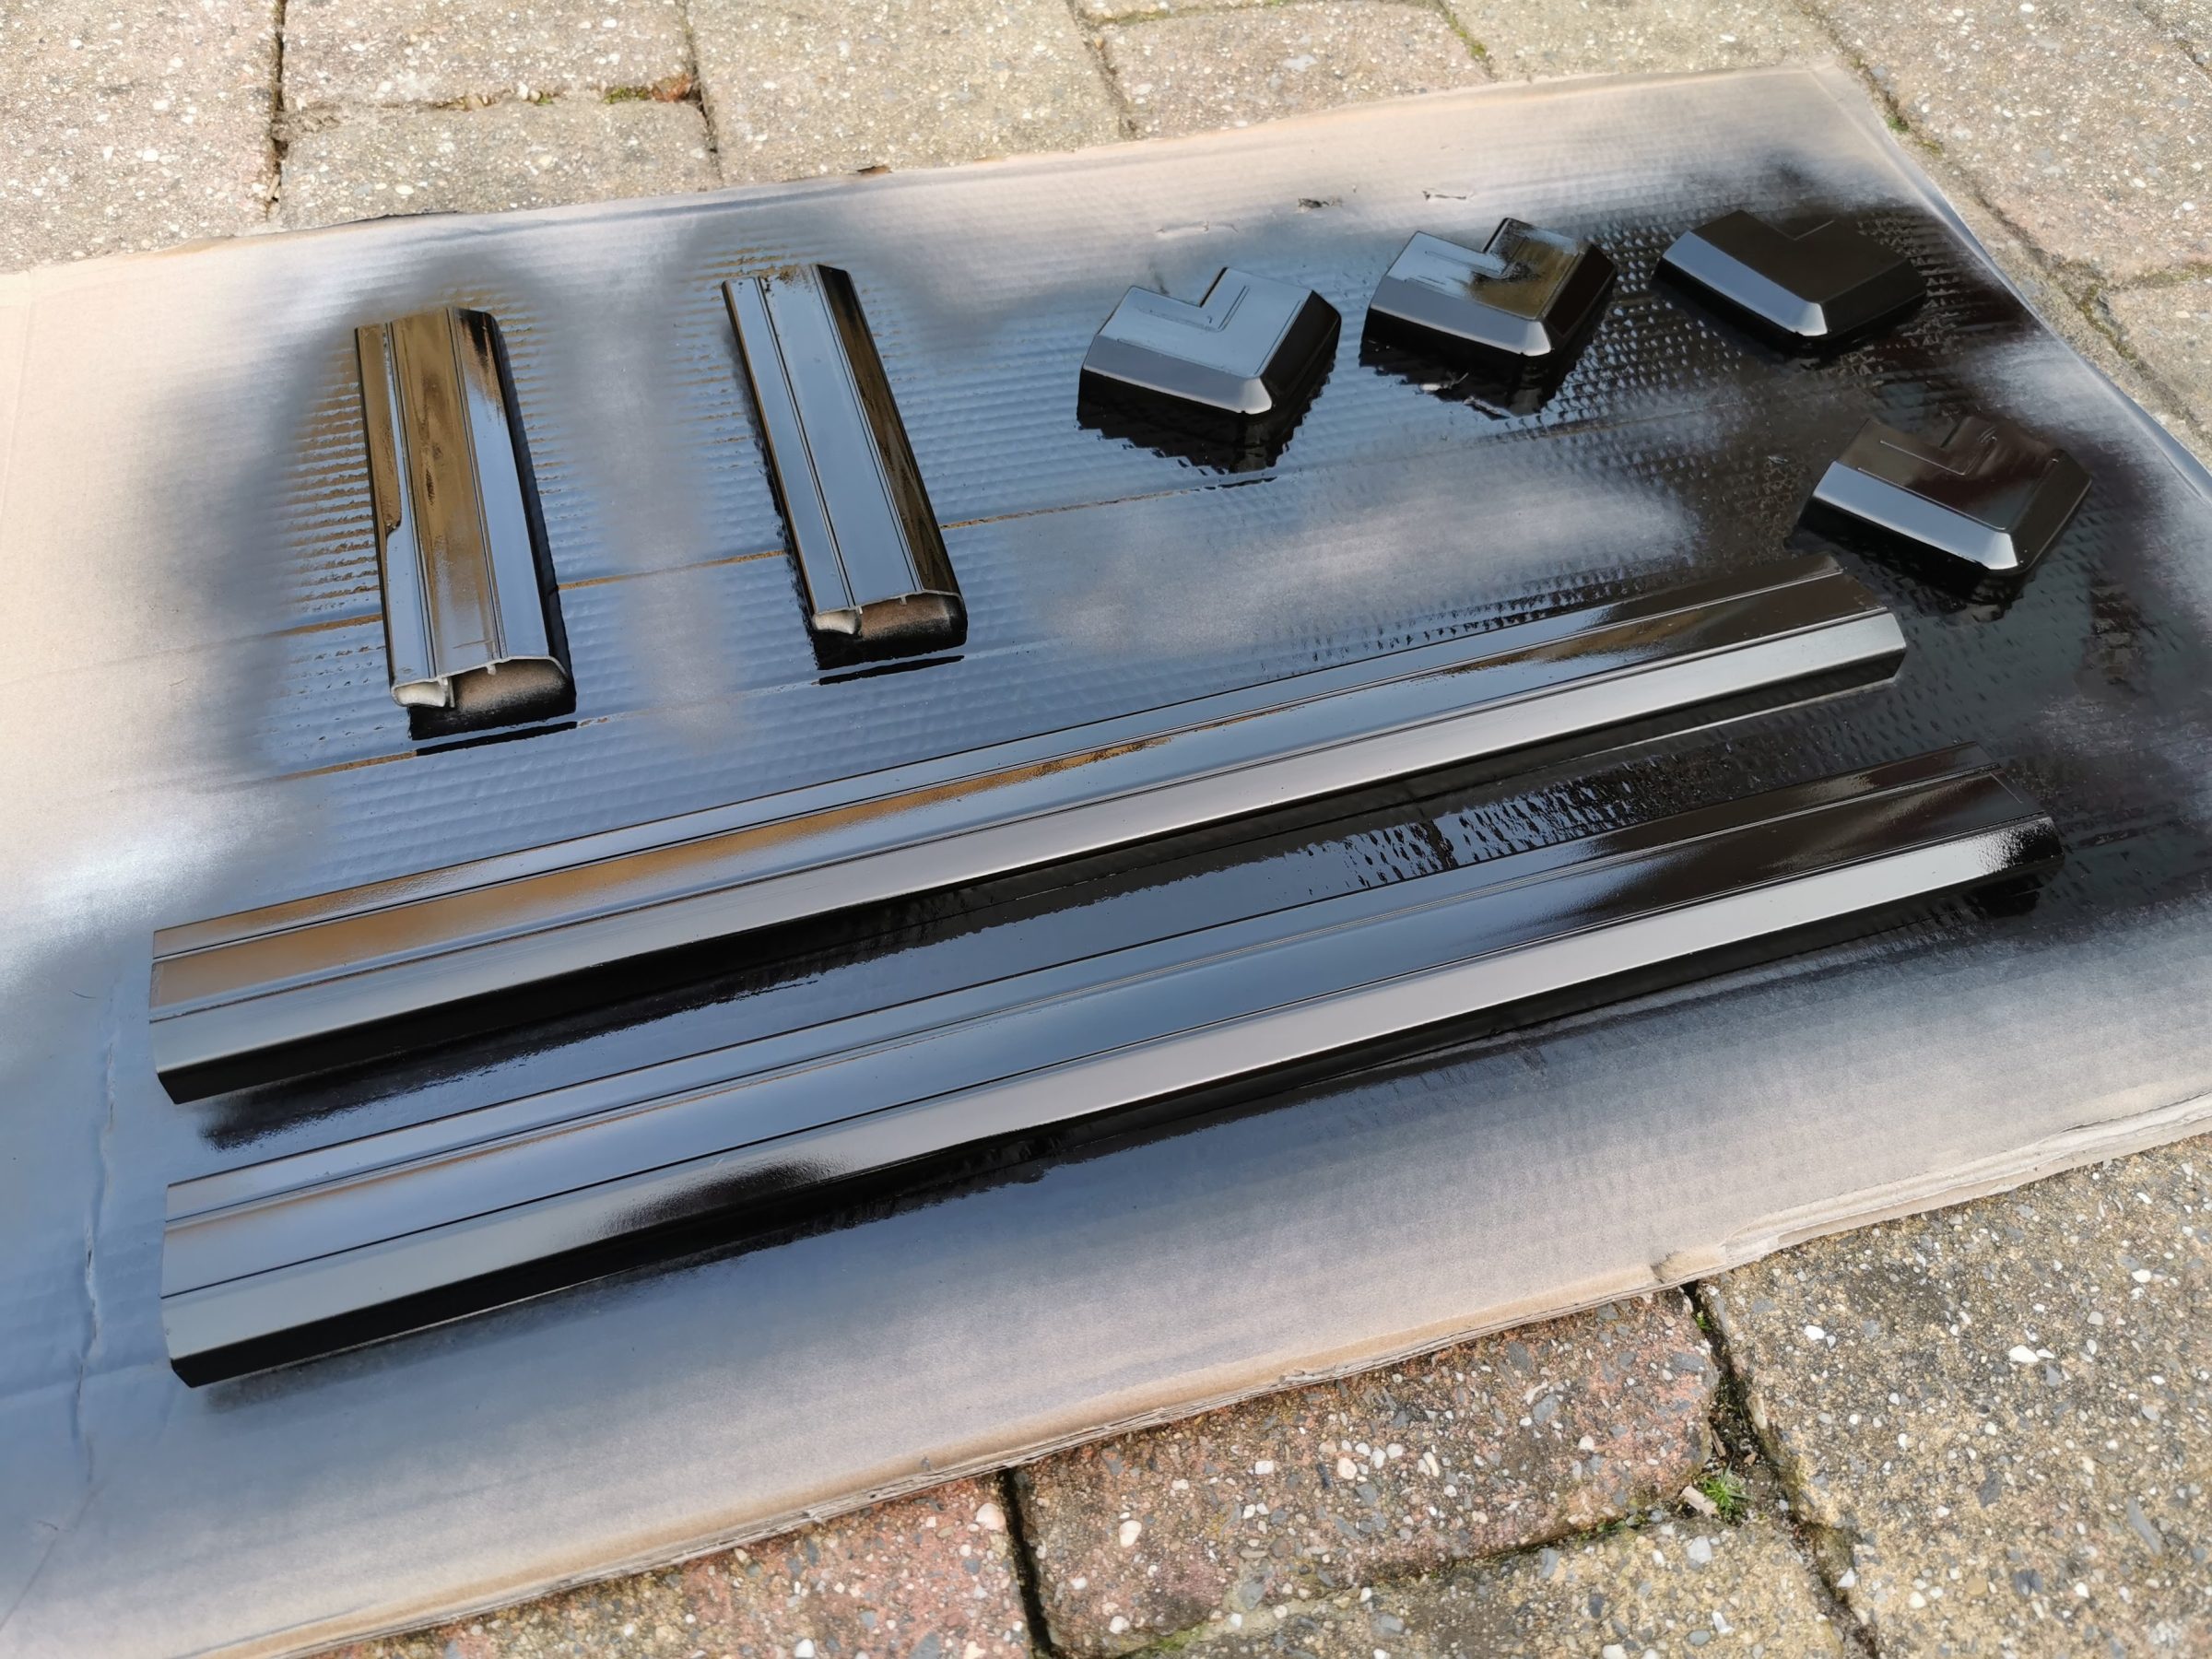
Spraying frames
We then carefully removed the dirty, gray decorative strips that were around the frame and cleaned, sanded and sprayed them black. I have this MoTip Black Gloss spray paint is used because this is a strong spray paint that adheres to almost everything without the need for expensive primers.
It is easy to do yourself and a black frame immediately gives a completely different look! You will notice that in later photos…
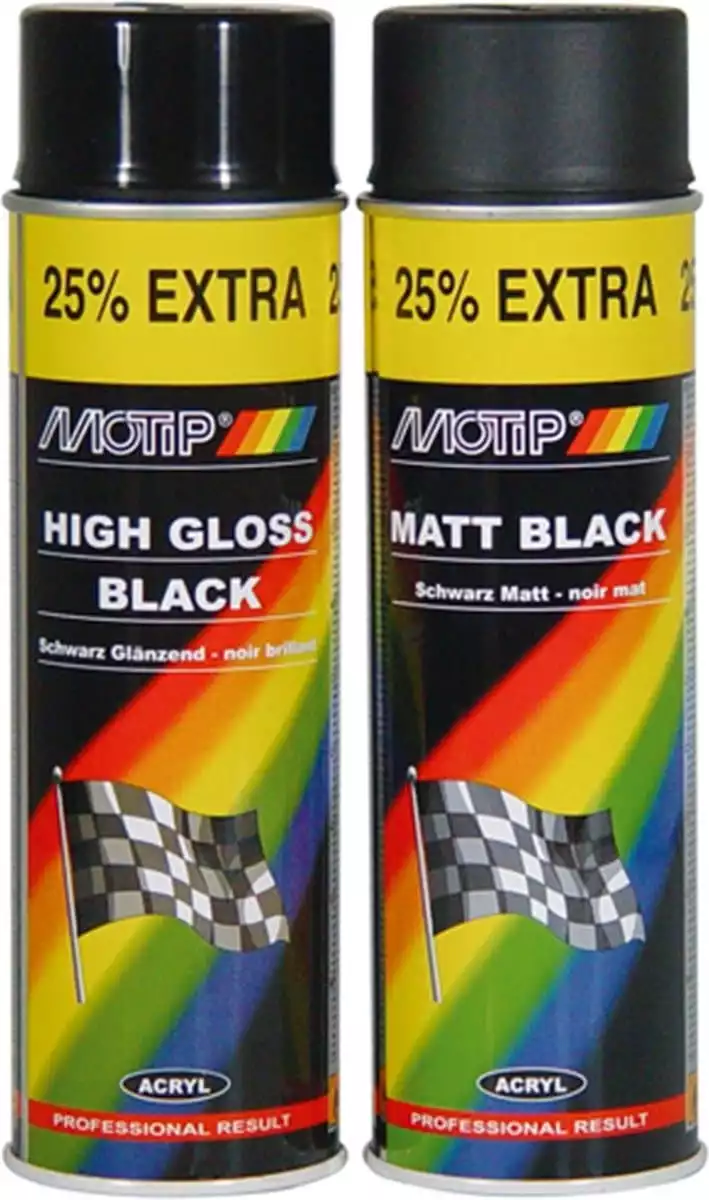
Multi Surface All-in-One spray paint from MoTip specially formulated to function as a primer, undercoat & top coat.
Apply the spray paint directly to wood, metal, plastic, ceramics and even rusted surfaces. Leaves an attractive glossy finish.
- 3-in-1 spray paint
- Attaches to almost everything
- Beautiful, glossy finish
Cleaning and whitening
Then we cleaned the rest of the cabin very well and painted the walls and ceiling with white, moisture-resistant lacquer. Now you immediately see that the contrast with the wooden frames and the black frames really gives a fresh, modern look. Thanks to the fresh white paint, the cabin as a whole has also become a lot lighter because the light reflects much better on the walls.
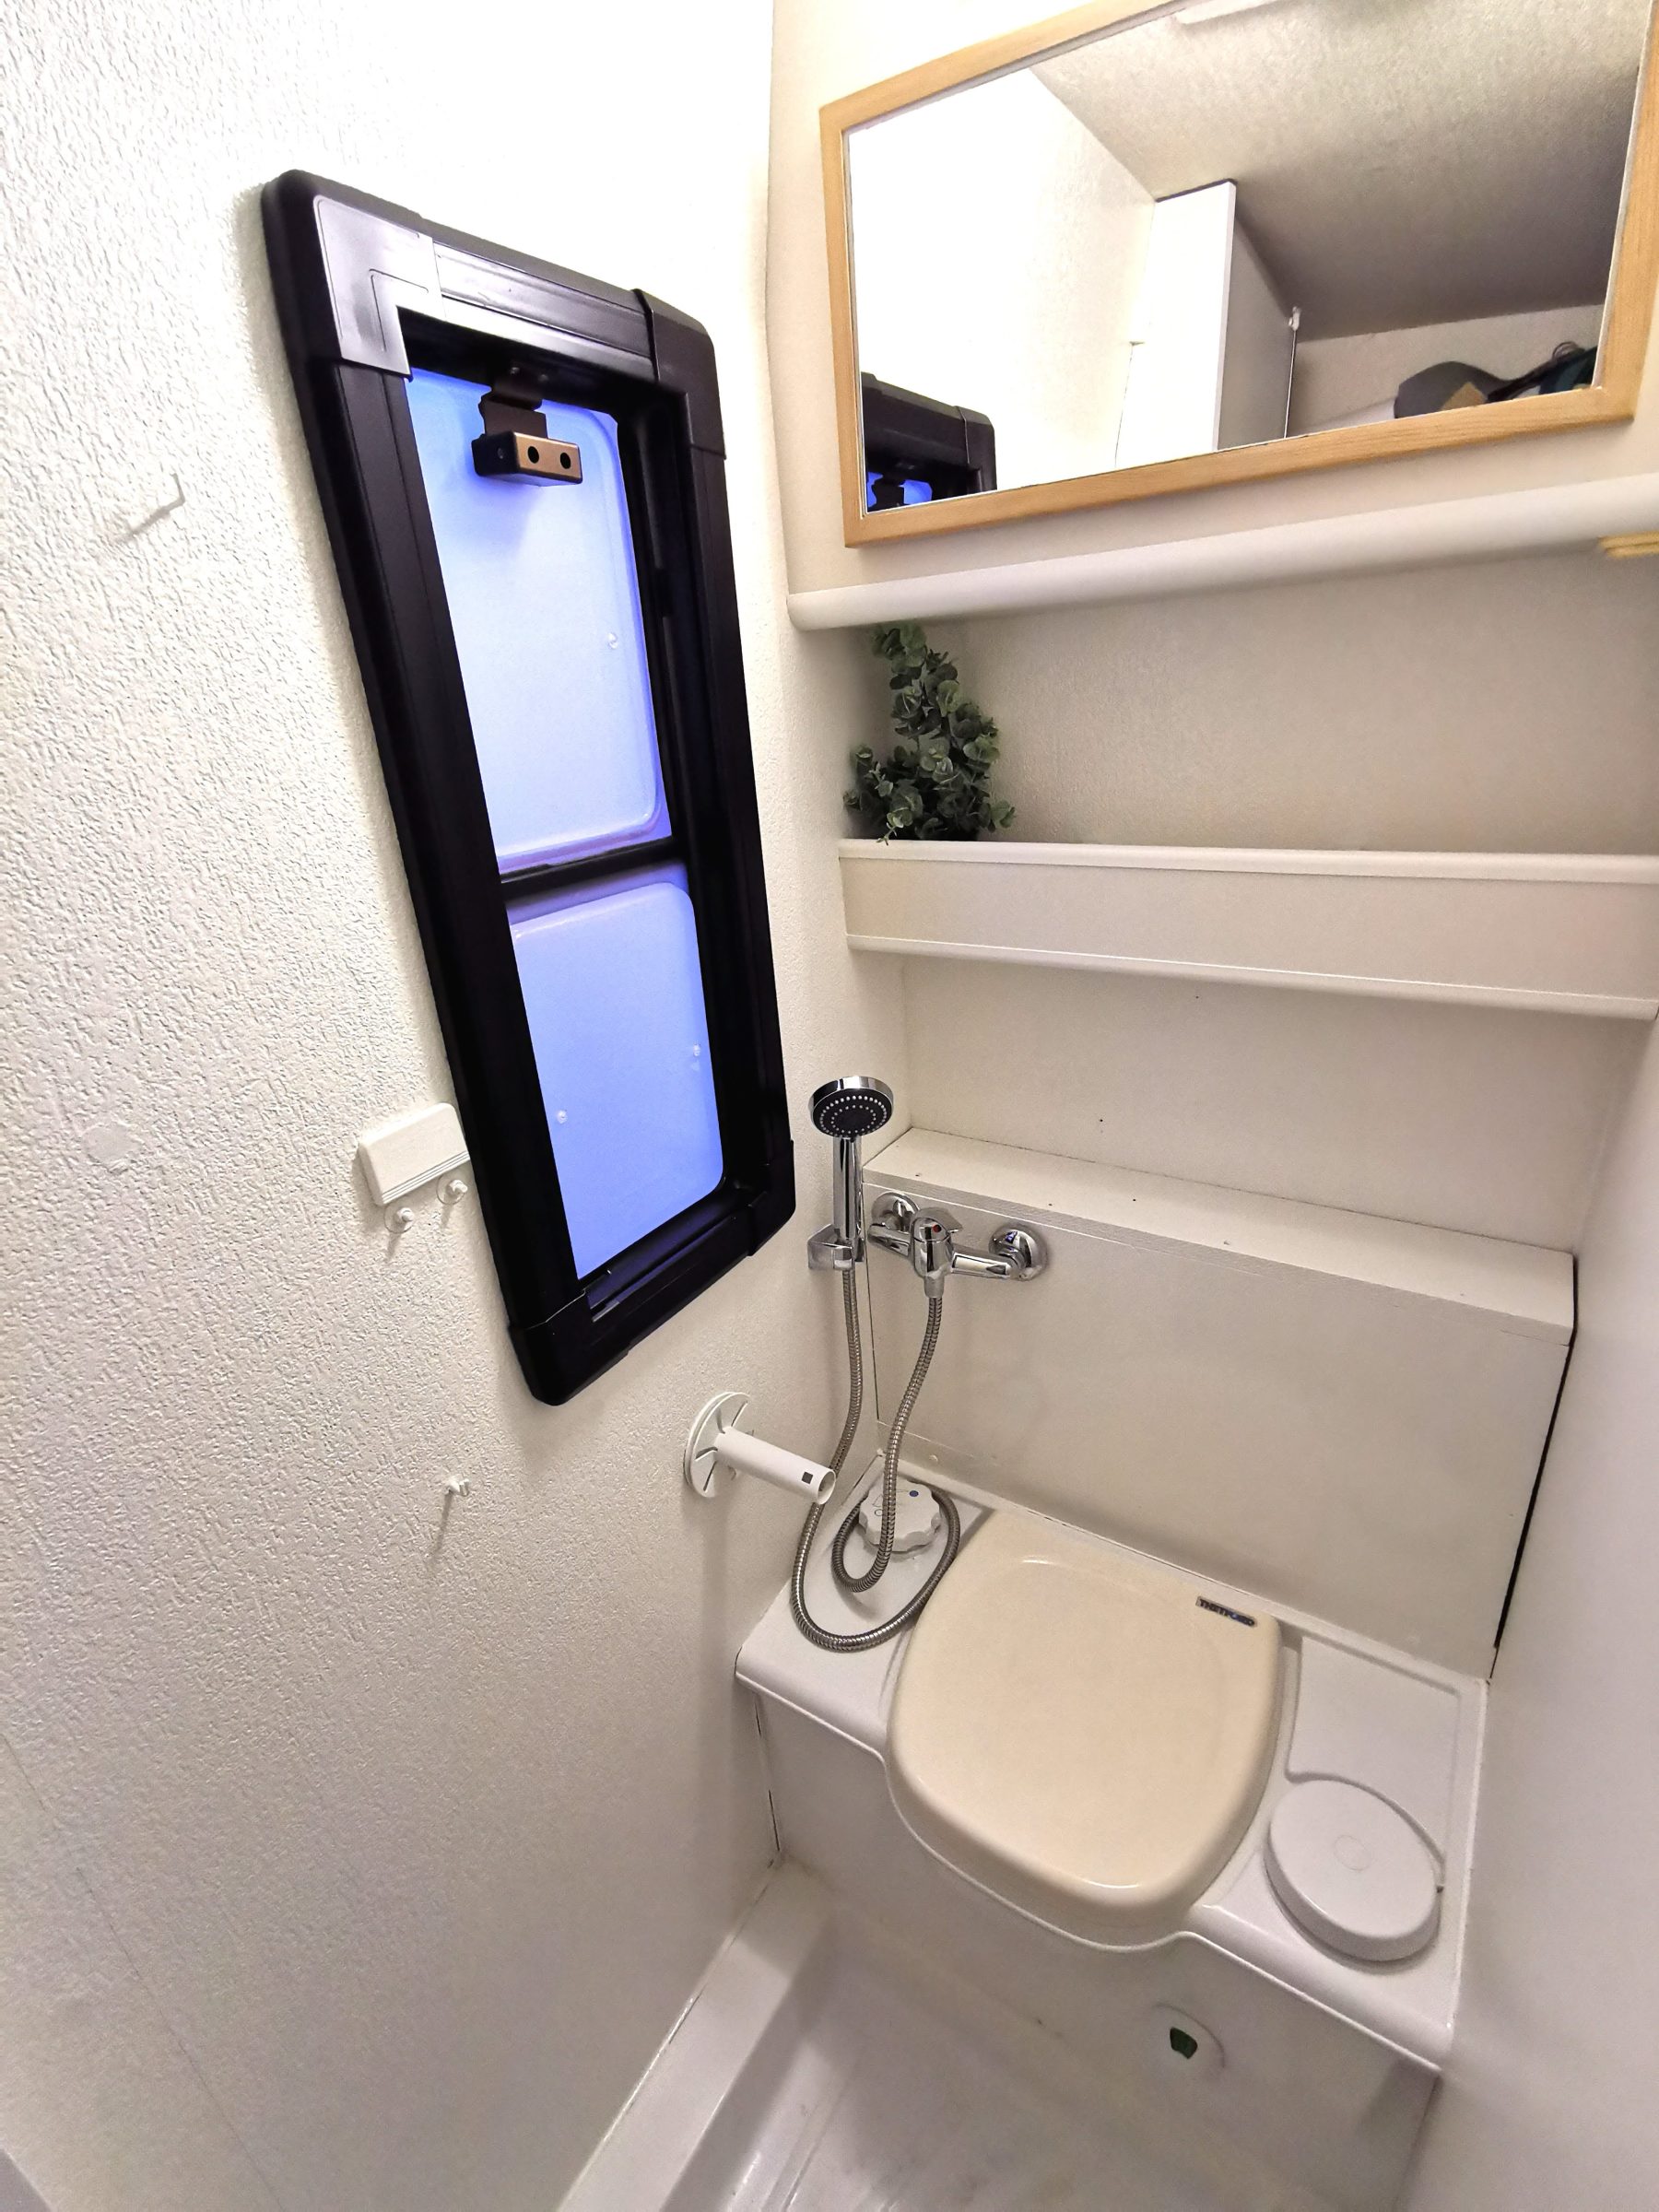
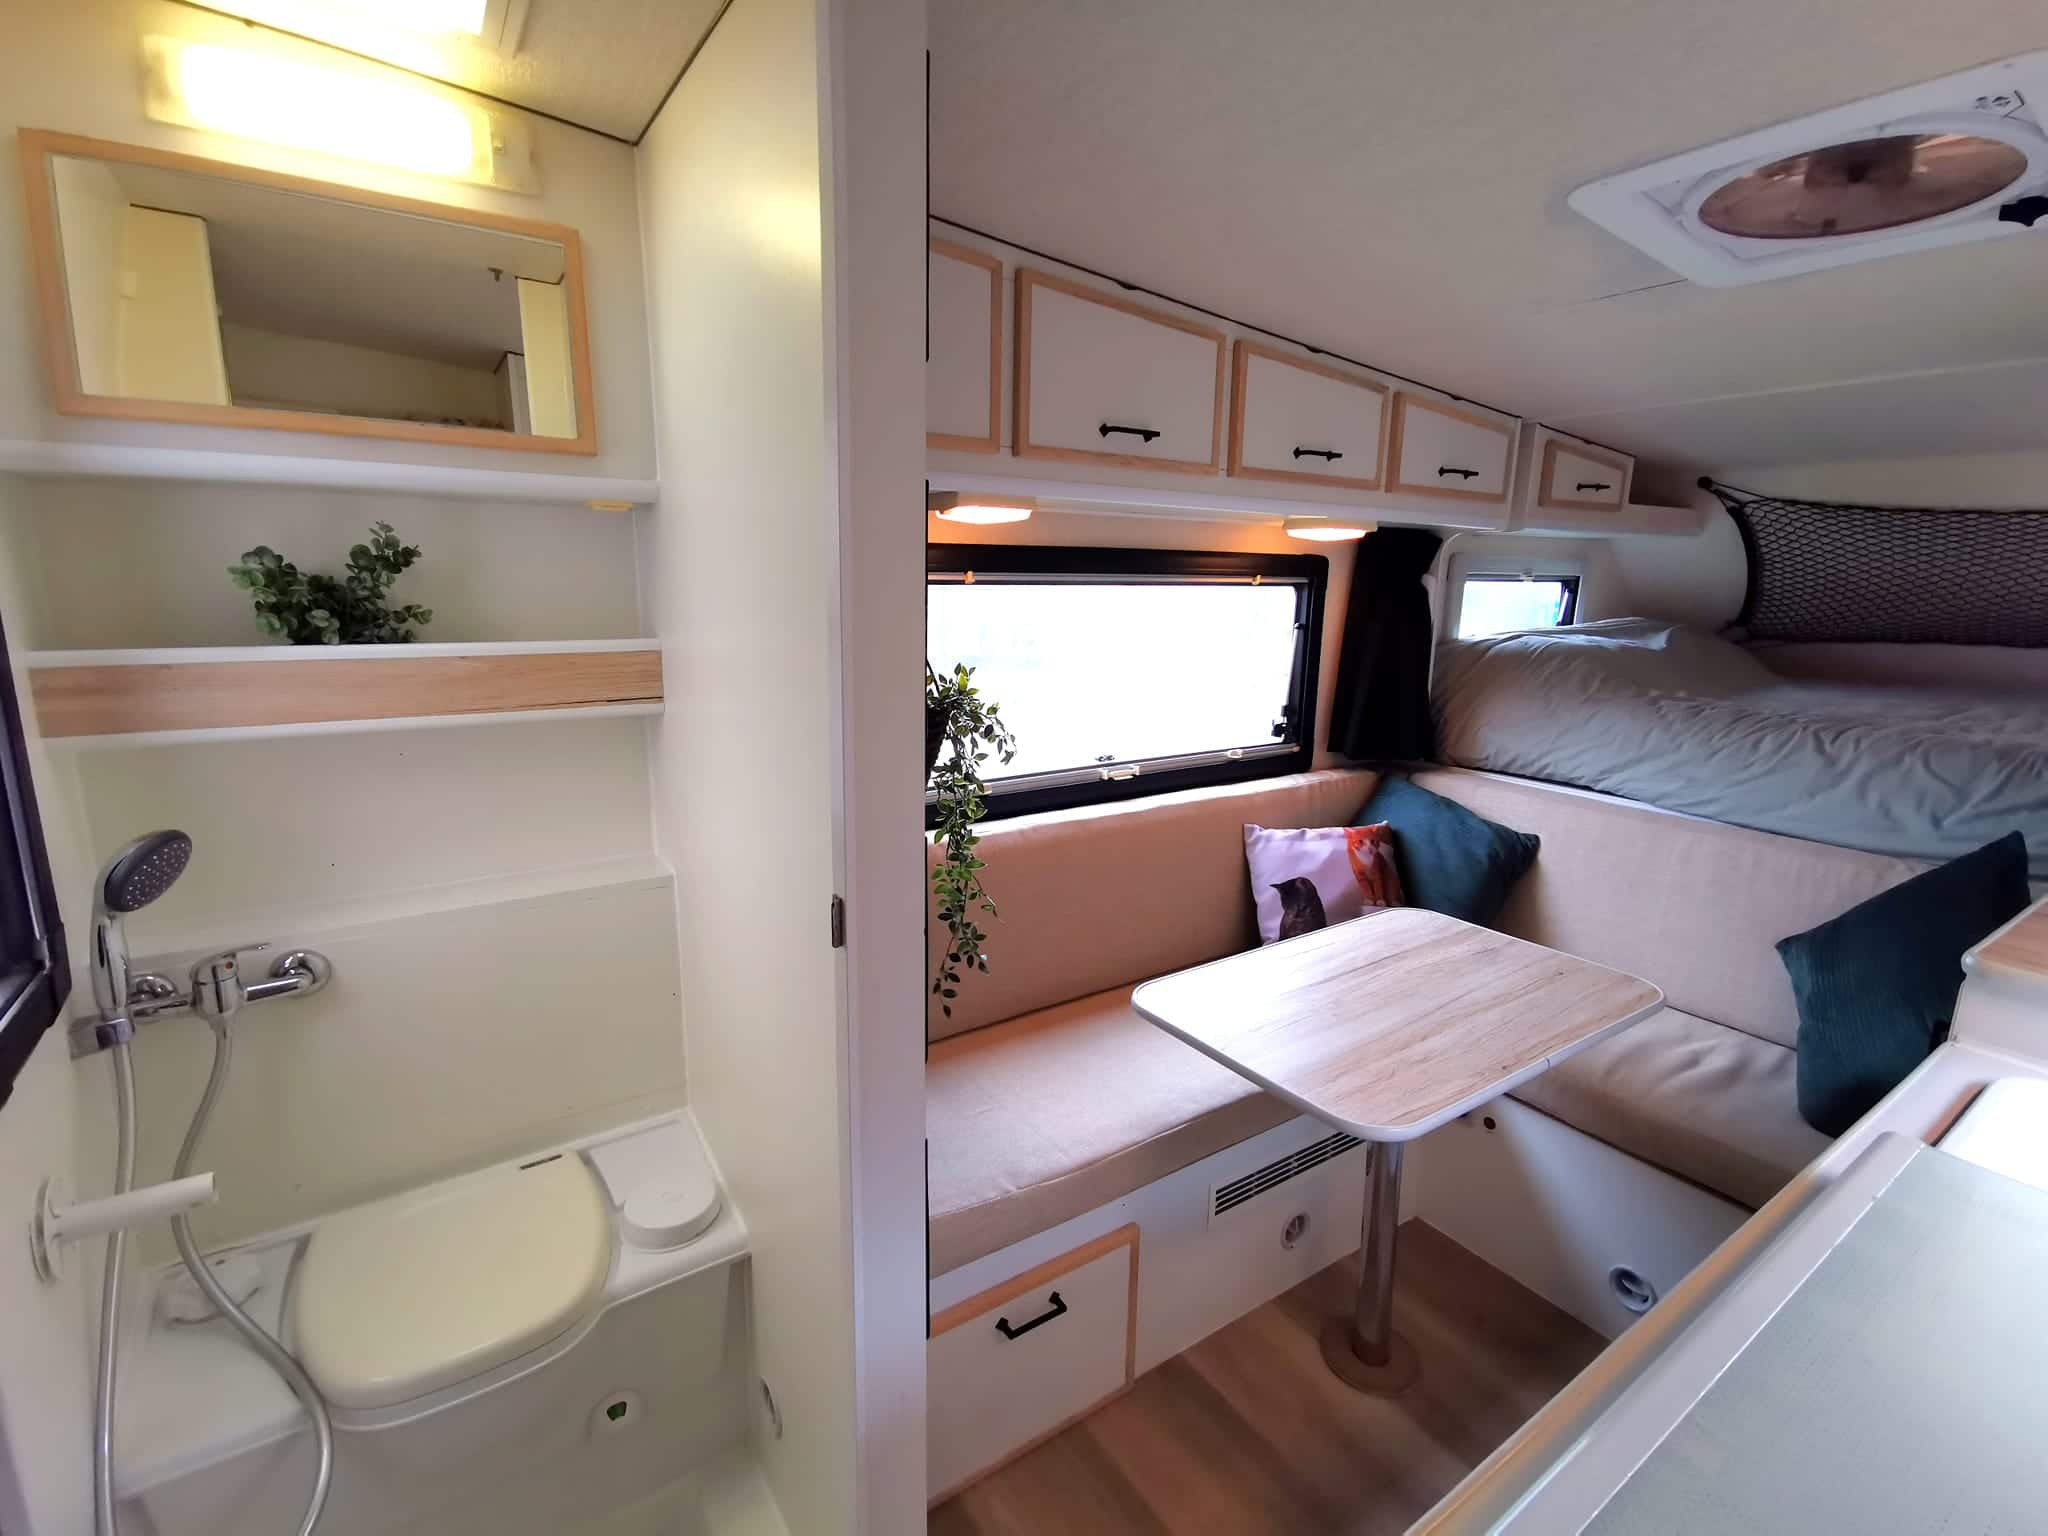
End result bathroom
You still see gaps, but that's because the photo above was taken before we started caulking. After sealing, we decided to finish it off with a piece of wood-look vinyl. The shelf you see above with the plant on it has been treated with a piece of wood-look vinyl from Kwantum to create a slightly more natural look. It is only a detail, but one that makes the whole a lot more beautiful and makes it look less sterile.
You can see the end result below.
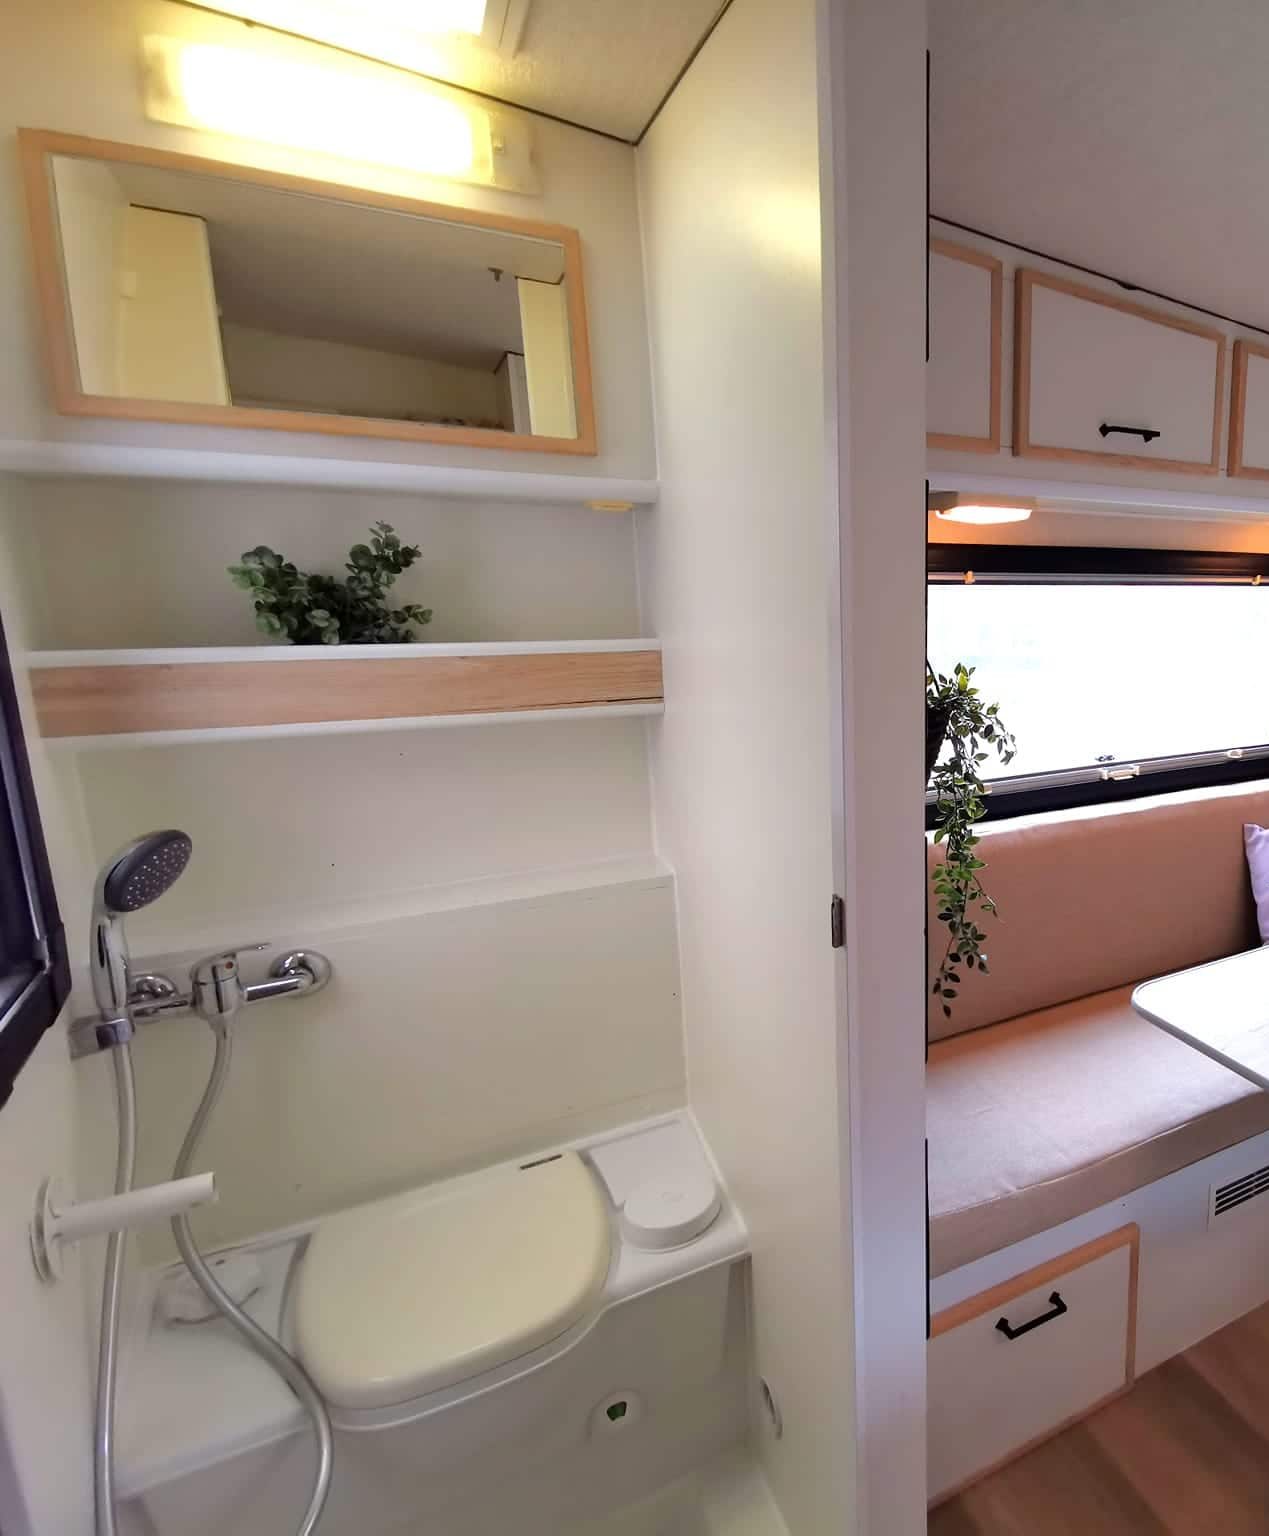
funfact: you may be wondering why we placed the new faucet on the far left of the shower cubicle and not in the middle? We have done this consciously!
A nice side effect is that we can now also hang the shower hose through the window at the back of the camper. So can we take a nice shower outside when the weather is nice?
Adjust the interior of the motorhome
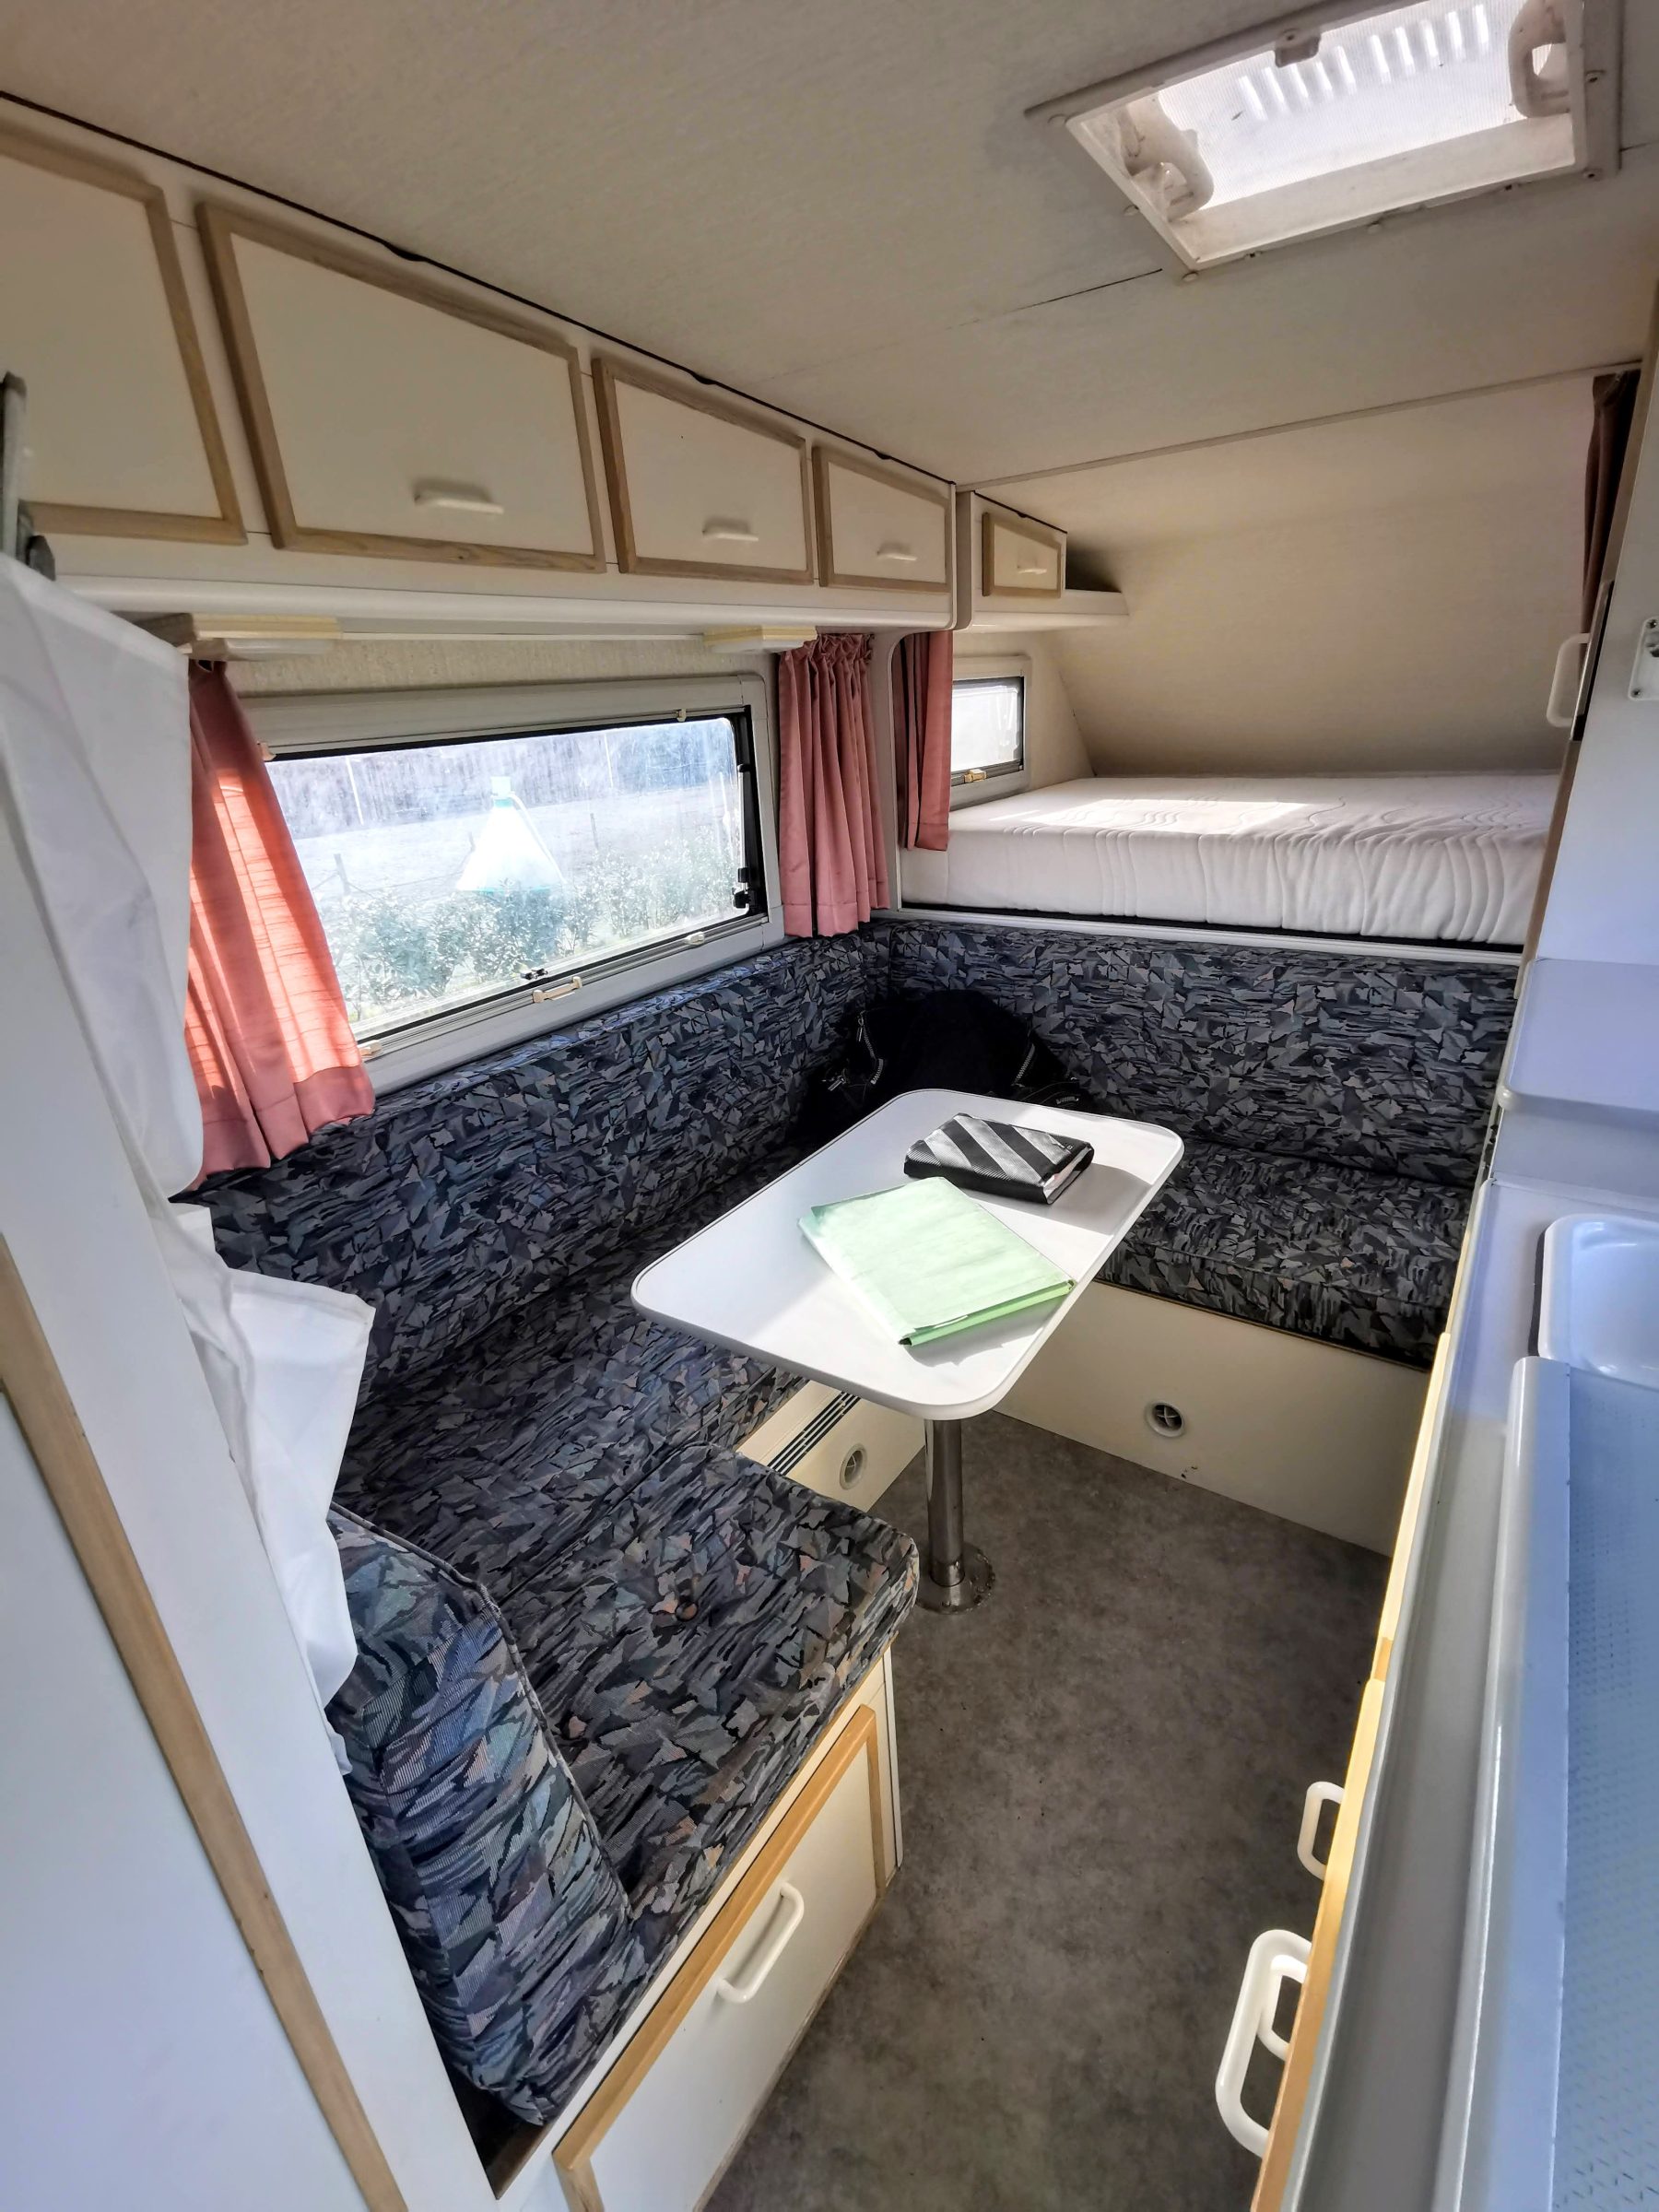
Then we moved on to the rest of the interior. The sofa in the living unit was built in a kind of U shape and therefore took up a lot of space, making it difficult to walk past each other. We thought that by removing a small part of the sofa we could create more walking space in the kitchen. We also didn't like the color combination of the busy print on the sofa and it certainly didn't match the pink curtains, the gray floor and the different wood tones.
Below you can see what the sofa, dining table, floor and curtains looked like before we started. It all looked neat, but in terms of styling we wanted to tackle the interior.
Windows and curtains
We also sanded and sprayed the frames in the living unit from light gray to black, just like we did in the shower cubicle. We have replaced the old pink curtains with new black curtains from the Kwantum. We had these made to measure, so it was a matter of measuring, choosing a fabric in the store and then waiting 4 weeks for the delivery of the order. After that it was simply a matter of hanging the curtains. Nice and easy!
Shorten and reupholster the sofa
We have shortened the bench a bit on one side (the piece that protrudes at the bottom left), so that we get some more walking space. For this part of the wood had to be demolished and then neatly finished again. The sofa now no longer has a U-shape, but an L-shape, which gives us more walking space.
Since the sofa is now a bit shorter, we also had to adjust the cushions. Our friend Yvon (you are a winner!), then reupholstered the sofa cushions for us. The sofa has now been given a natural, calm sand color. You can clearly see the changes in the photo below. Scroll back up to compare!
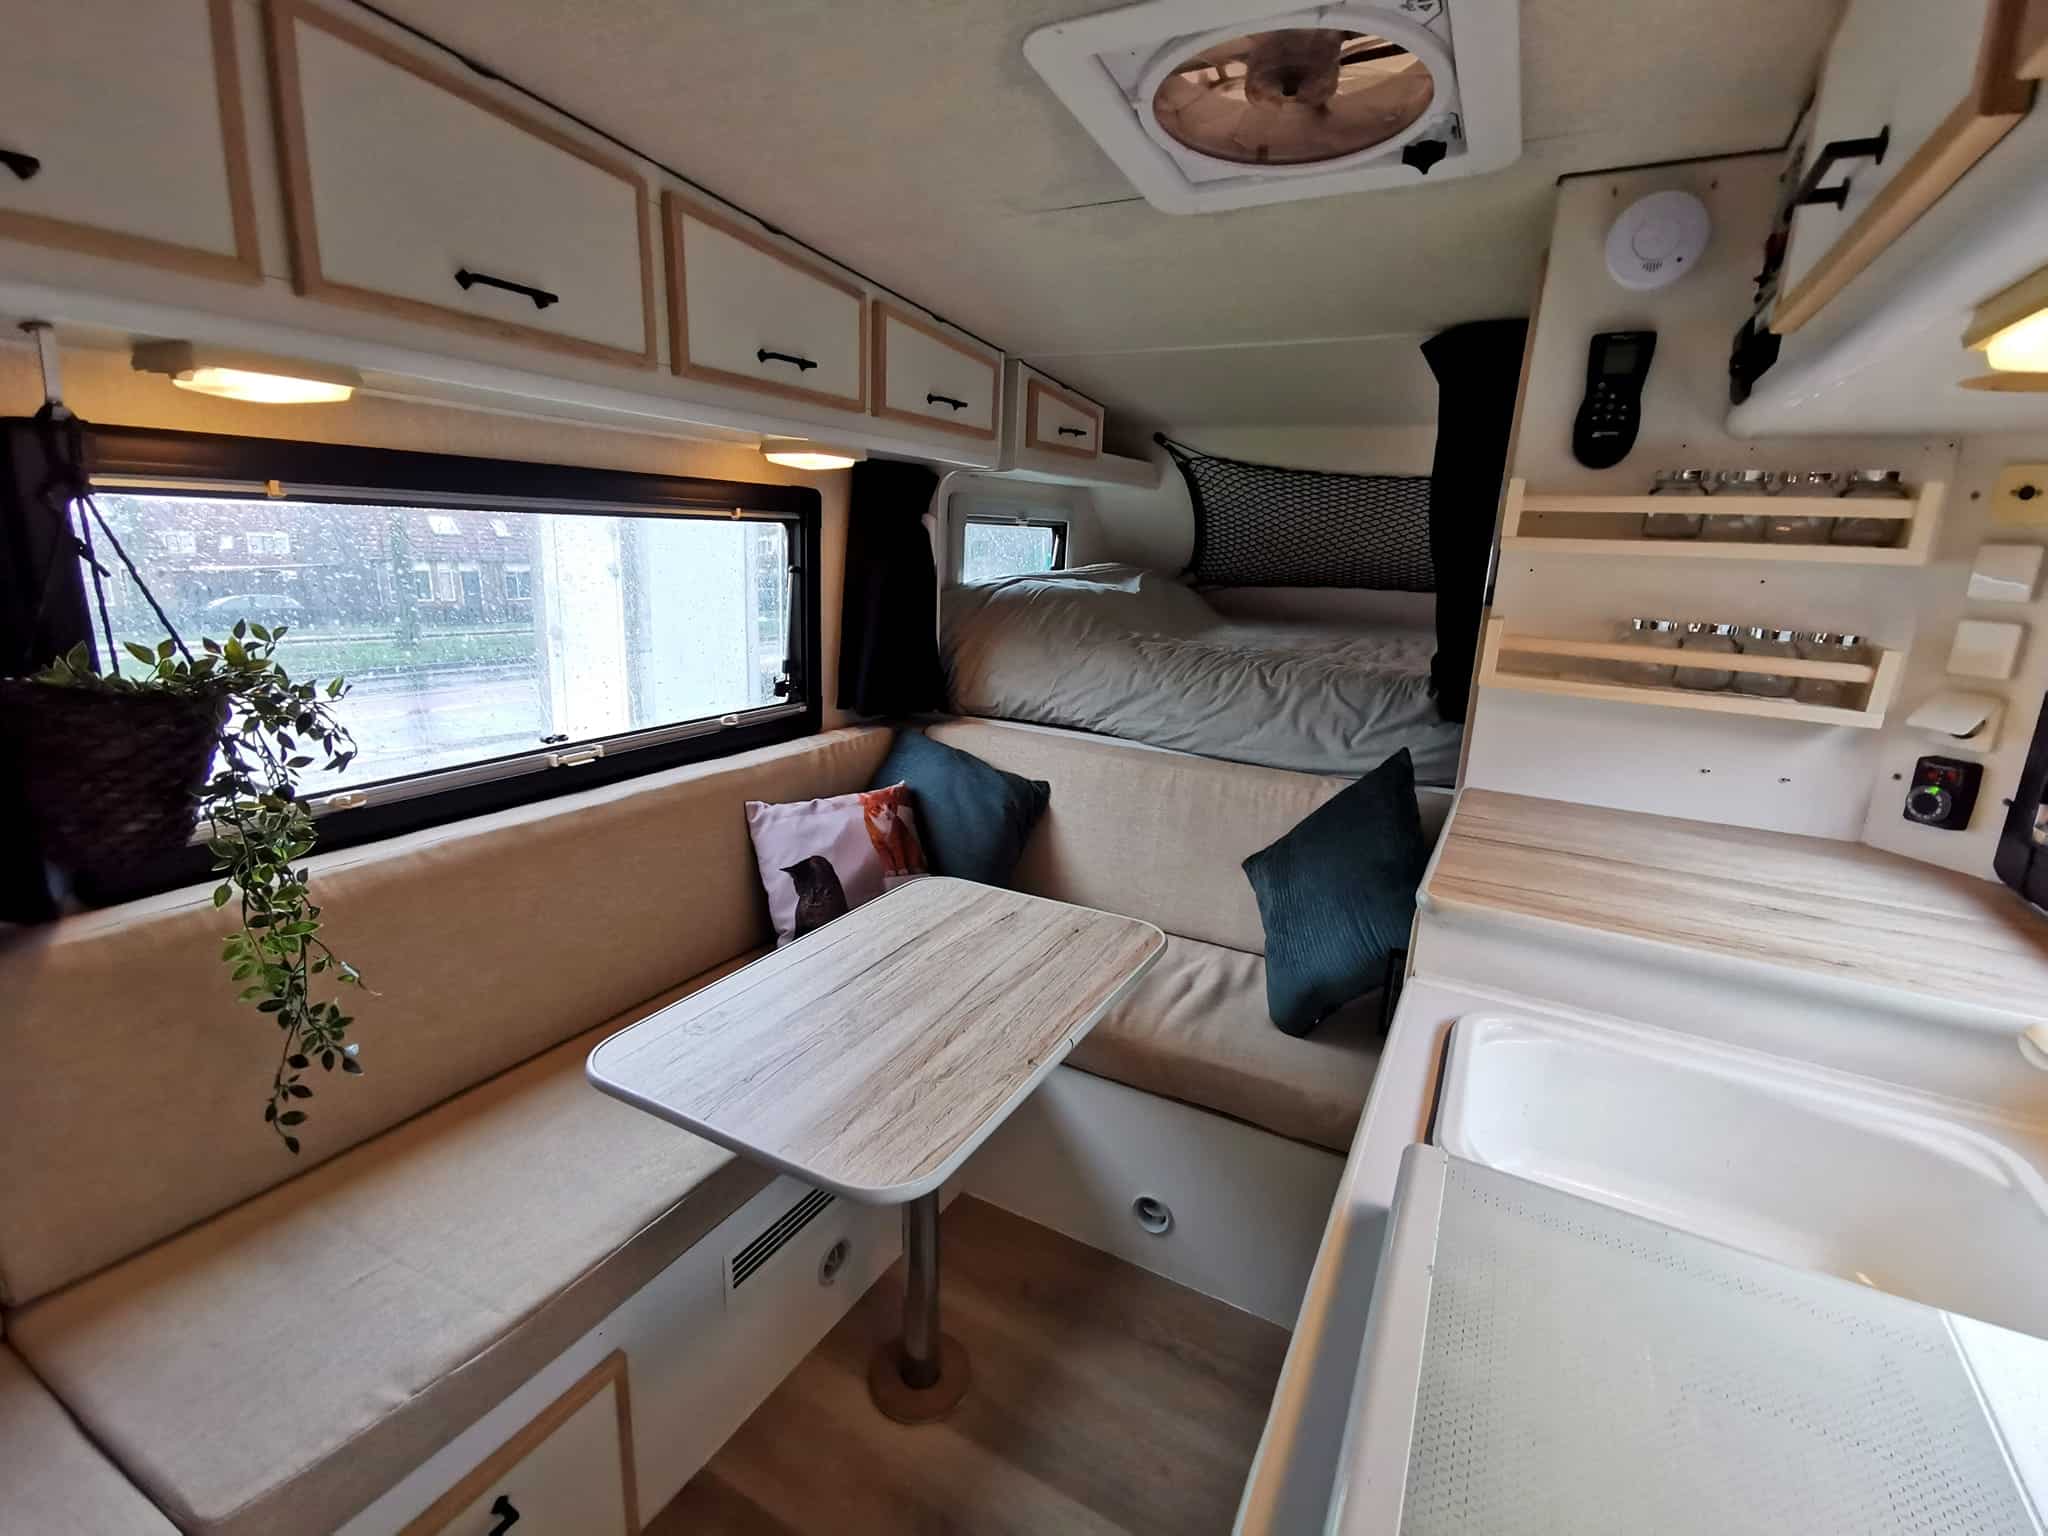
Vinyl wrap, spice racks and black handles
To make everything more of a whole in terms of colors, we have also wrapped some parts, such as the table and countertop, with wood-look vinyl. The new wooden spice racks come from IKEA and all the white plastic handles in the camper have been replaced with sturdy black steel handles that I ordered on Amazon.
New PVC floor
We also pulled out the worn gray tarpaulin from the floor and replaced it with solid PVC laminate, also in wood look. PVC laminate is not only beautiful and durable, the cork layer on the underside also insulates very well. Very suitable for campers.
Proplus storage nets
In the meantime, we also started thinking about extra storage space. We thought we could create more storage space by installing a number of black, elastic storage nets from Proplus.
Water bottles, vegetables, your shoes, a blanket, a backpack or something else. These nets are super handy! If you look closely at the different photos, you will spot several in different sizes.

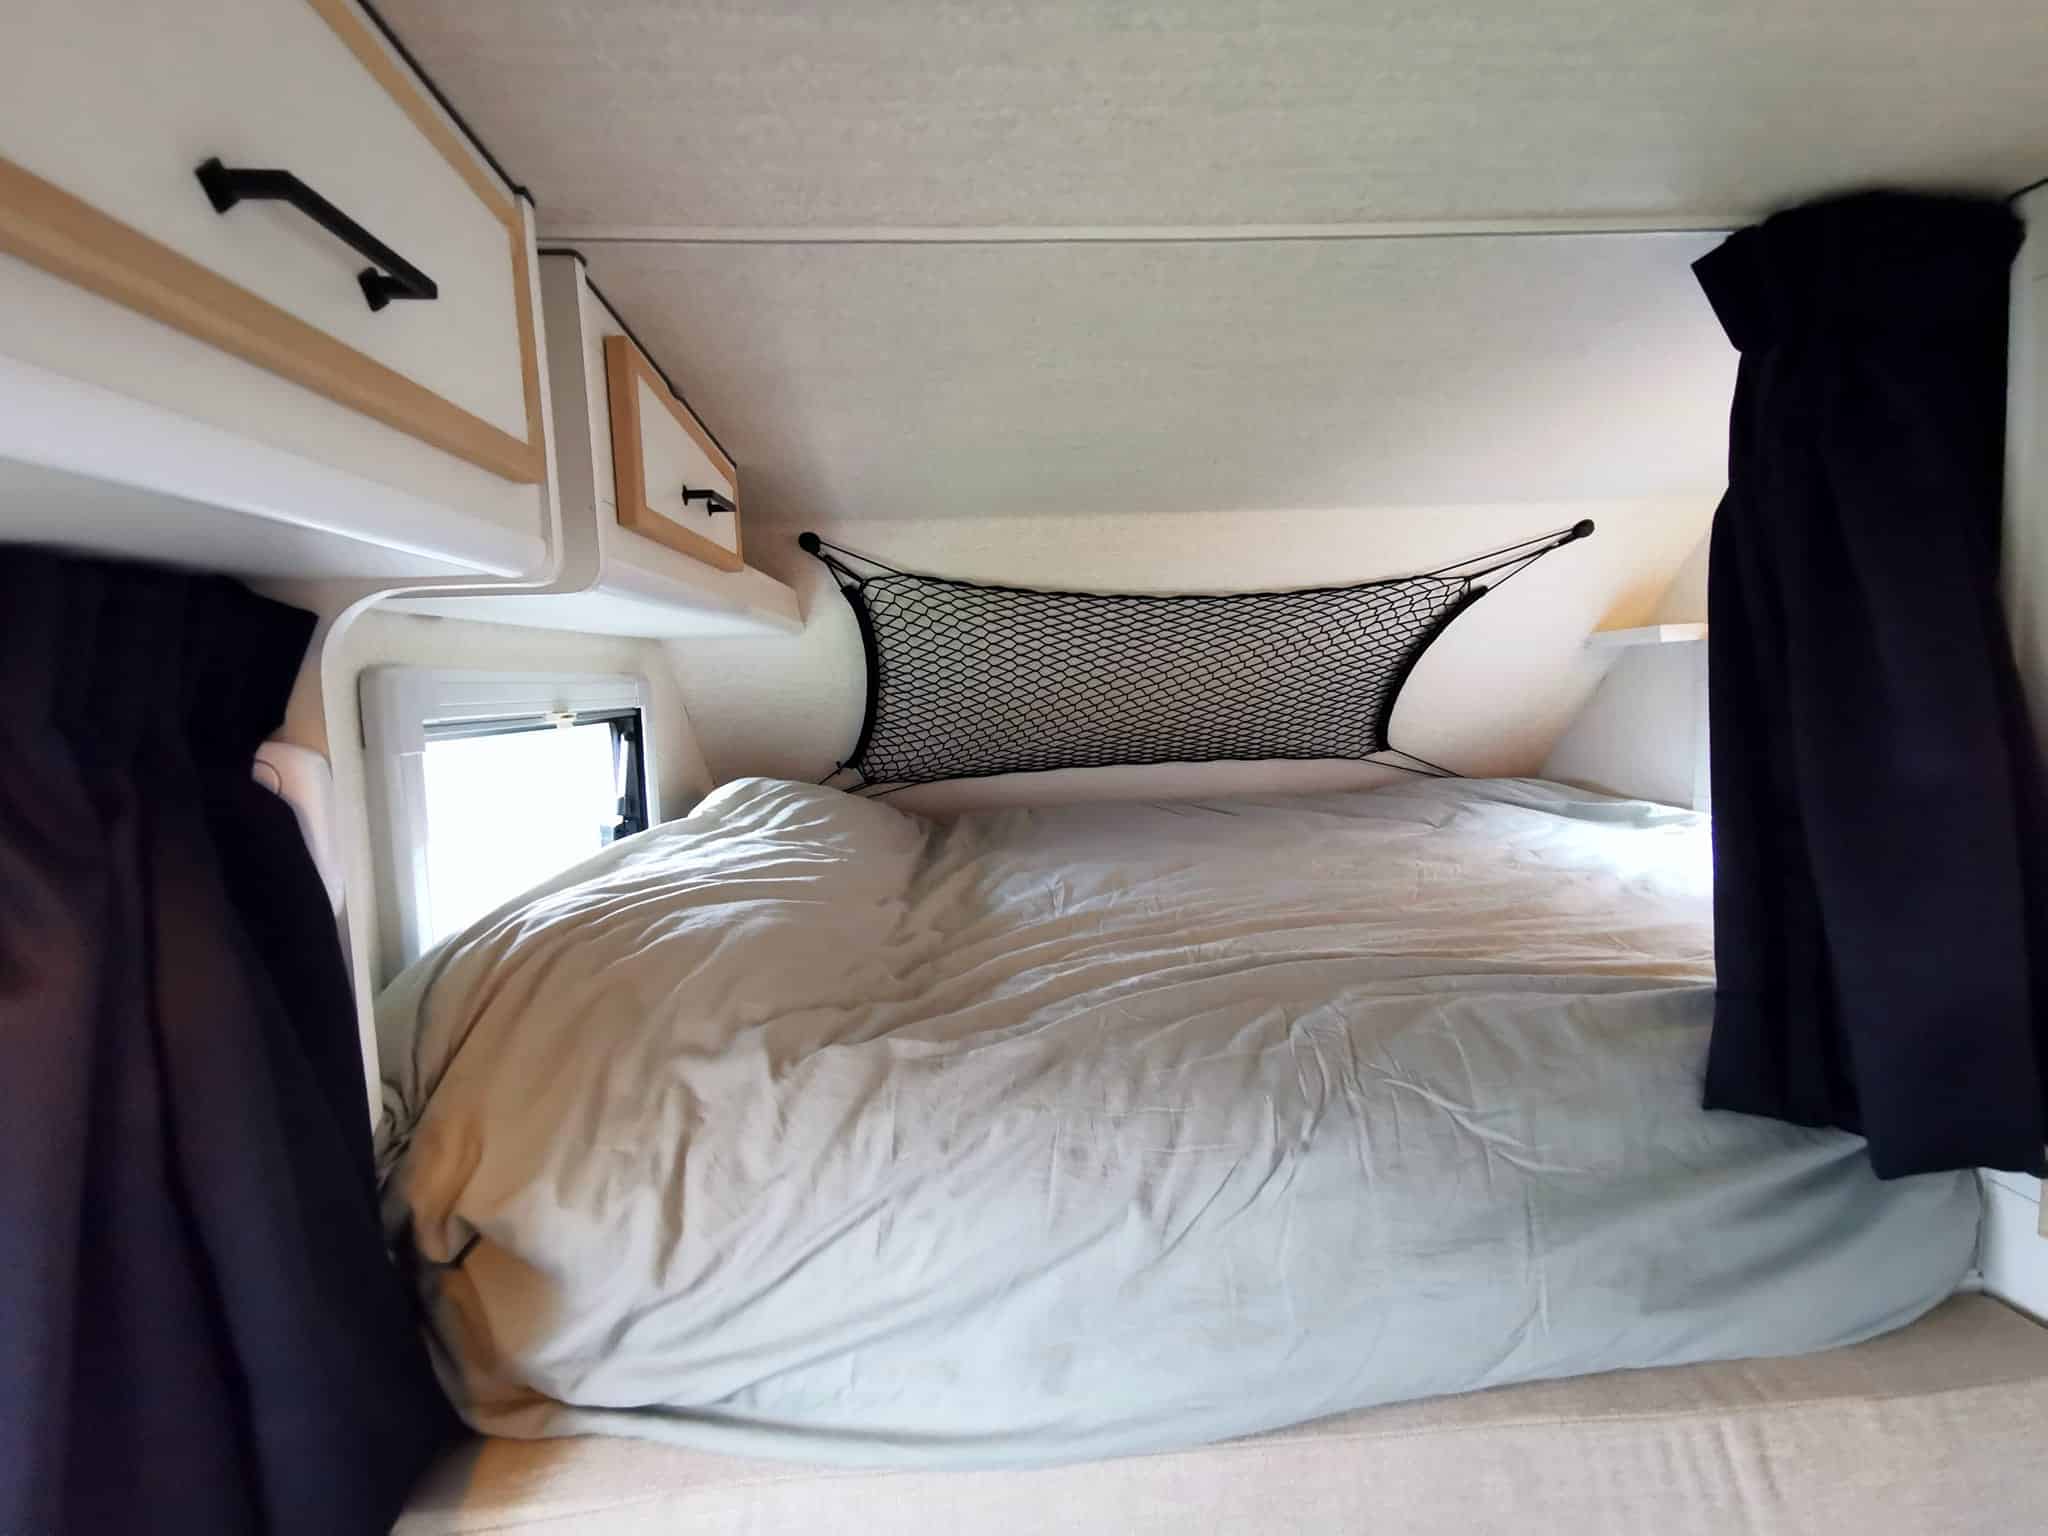
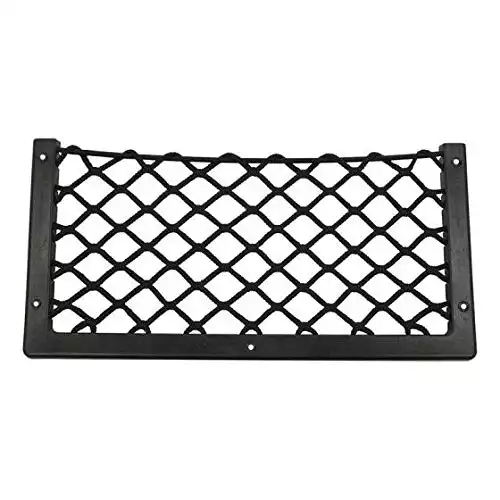
ProPlus storage nets with a plastic frame are useful for quickly and easily storing water bottles, vegetables, shoes, gadgets or other items. The sturdy frame and thick elastics keep everything in place.
shades of green
Finally, we added some green tones to the natural wood color and the black accents. These are just details, but we think that the dark green cushions, the light green bed and a few (artificial) plants give the styling of the interior that little bit extra.

That's it for now! Curious about what gadgets and upgrades we have added to our camper to increase living comfort? Then read the two blogs below that focus more on the (electronic) gadgets and technology of the car.
Also read: Our 4×4 world trip camper (2) | Gadgets & Upgrades
Also read: Our 4×4 world trip camper (3) | Technique and upgrades to car